Lucky’s Market

Lucky's Market

Disclosure: This post is sponsored by Lucky’s Market. The Newlywed Chefs were paid for this post, however, as always, all opinions are 100% our own.

Today we’re highlighting one of our favorite places to shop for groceries in St. Louis: Lucky’s Market. Lucky’s is a grocery chain that brings fresh, natural, and organic food to shoppers for a reasonable price. Here in St. Louis there are two locations: Ellisville and Rock Hill. Why do we like Lucky’s so much? We’re glad you asked. In no particular order, here are some of the reasons why we love Lucky’s:

dsc_0547
Coffee: As daily coffee drinkers, we appreciate good beans. Lucky’s has a wide variety of whole bean coffee for a good price. It’s over near the bulk section, and we fill our brown paper bag with as much or as little as we’d like to try. They also have ground beans and pods, so no matter how you like to brew, Lucky’s has you covered.

dsc_0606
Fresh Seafood and Meat: Lucky’s has meat and seafood with prices that won’t break the bank. All-natural, grass-fed, premium, smart, are all labels that you might find on their meat. We feel good buying high quality, less processed meat.  If you’re in a hurry, they have a good selection of seafood that is already seasoned and will reduce your prep time at home.

dsc_0597
Sip + Stroll: For $2.00, Lucky’s customers can sip on a selection of local beverages while they shop. They even have cup holders for your cart. When we shop at Lucky’s, we usually go over to the bar first and get a local draft beer from Schlafly, 4 Hands, or Urban Chestnut, then proceed to do our grocery shopping. They also have Fitz’s root beer on draft. Even if you don’t need to shop for groceries, you can grab a beer and sit at their bar, or cozy up in a leather chair over in the lounge area.

dsc_0679
Garden: Seasonal flowers, plants, herbs, and other outdoor essentials greet customers as they enter Lucky’s. The deal on these beautiful mums right now is 2/$10! I haven’t seen a better price around St. Louis for mums this year. We’ll have some on our porch by the time this post is up!

dsc_0515
Lucky’s Brand Groceries: Lucky’s carries their own line of grocery items, from fresh cheese to chips to chicken stock to hummus. Since these products are unique to Lucky’s, they aren’t sold anywhere else. In addition to Lucky’s brand groceries, they have brands that you know and love, so you can shop for your favorites and also try something new.

dsc_0658
Natural Living: Lucky’s has a whole department devoted to body and beauty products. In this section, you’ll find protein powder, deodorant, soaps, essential oils, vitamins and more. We love shopping for Mrs. Meyer’s Clean Day and Dr. Bronner’s soaps at Lucky’s, because they carry a wider selection of scents than any other store we’ve found.

dsc_0642
Bakery: The bakers at Lucky’s make fresh bread, cookies, donuts, and more on a daily basis. They’ll slice any of their loaves for free, and also sell bread from other local bakeries (Fazio’s, etc.).

dsc_0647
Pizza: Next to the bakery, you’ll find the mouth-watering pizza selection. You can build your own 16″ pizza or order one of their signature pizzas for only $10. On Fridays, they’re only $8. The best deal in the store (our personal opinion) is two slices of pizza and a pint of beer for $5.

dsc_0537
Bulk: The bulk section at Lucky’s can’t be beat. Flour, grain, oats, snack mixes, and more. The unique treats we find in this aisle keep us coming back for something new to add to our brown bag lunches or sneak as a late night snack. I’m currently munching on their cinnamon yogurt covered pretzels from the bulk section as I type. So good!

dsc_0611
BACON: Who can say no to house cured and smoked bacon? Lucky’s bacon is GOOD. They carry an assortment of flavors. Hot cooked bacon is also usually available to sample, although the samples go fast because it fills the whole store with that irresistible smell.

dsc_0665
Community Involvement: If you bring your own grocery bags, Lucky’s will give you a chip. On the way out, you can place the chip in a box detailing one of the local charities Lucky’s currently supports and they’ll donate money toward that charity.

dsc_0491
Shopping at Lucky’s is always a fun experience. Feeling good about the ingredients we buy is important, and we love how much Lucky’s supports other local St. Louis companies. There are often local vendors giving out samples of their products and new St. Louis items featured in the store. Lucky’s reminds us that grocery shopping can be enjoyable and even meaningful. We’re LUCKY (HA!) to have two locations in St. Louis.

All-Clad d3 ARMOR Fish Pan Giveaway!

dsc_0554


This post is sponsored by All-Clad. The Newlywed Chefs received product compensation from All-Clad during this collaboration, however, all opinions are 100% our own.

UPDATE: We used a randomizer to select a winner! Congrats to Steve Weber! Please e-mail us at: thenewlywedchefs@gmail.com to claim your prize.

We are super excited to partner with All-Clad to share an original recipe with you using one of their products. All-Clad is a brand we enjoy promoting because we use their products regularly in our kitchen. We were challenged to create a fall inspired seafood dish using the All-Clad d3 ARMOR Fish Pan, and we gladly accepted.

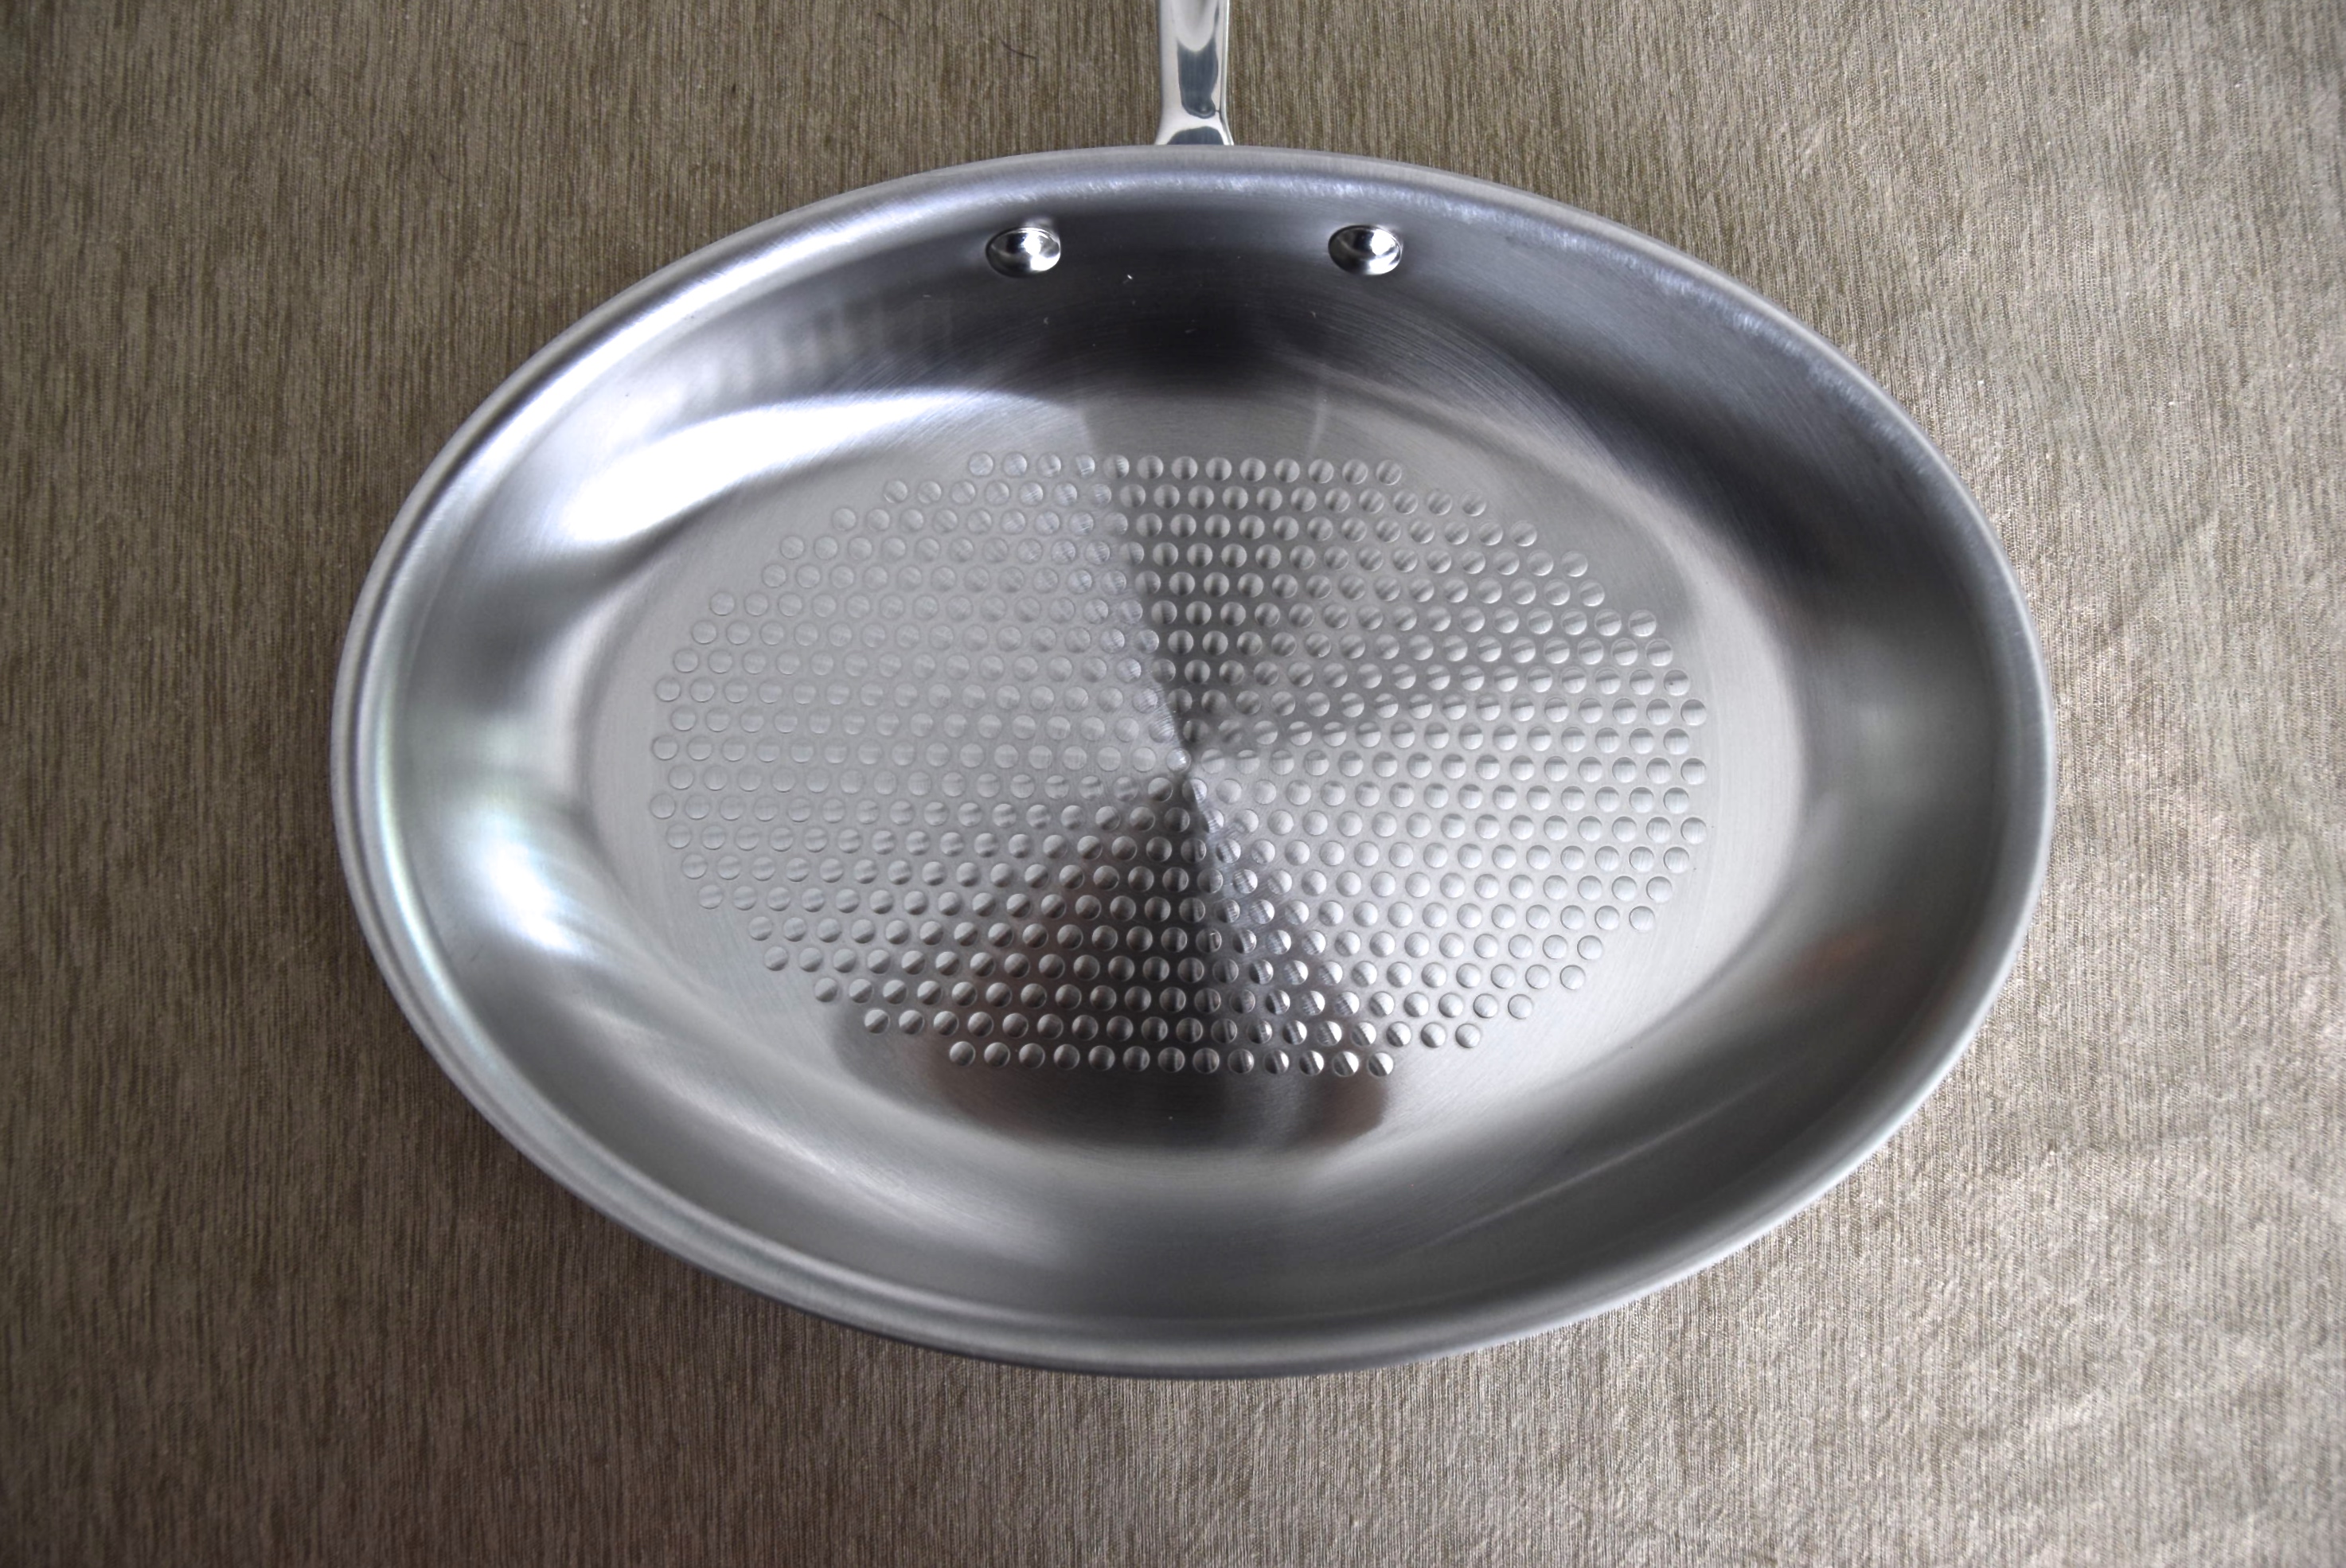
One thing we really like about this pan is the unique oval shape. It fits fish perfectly, but would also be great for making steak, veggies, and even omelets! The sides have a nice height to them, which reduces the chance of splattering.
dsc_0501
The riveted surface of the interior allows for easier release of food (especially when olive oil is used). We also love that clean up is a breeze with this pan. It’s dishwasher safe, so on weeknights when we’re rushing around making a somewhat healthy meal, we can throw it in the dishwasher and not worry about damaging the pan. Here are some other facts about this sleek product:

All-Clad d3 ARMOR Fish Pan (Retail Price: $199.95)

  • 13″ diam., 3 3/4″ high
  • 2 lb. 9 oz.
  • Made in USA
  • Tri-ply construction sandwiches a heat-responsive aluminum core between an easy-care stainless-steel interior and exterior.
    • Riveted surface on the interior promotes effortless release and easy cleanup
  • Bonded-metal construction ensures fast, even heating

The d3 ARMOR Fish Pan is available at Williams-Sonoma.  For more information please visit the All-Clad website. (Keep reading for the GIVEAWAY!)

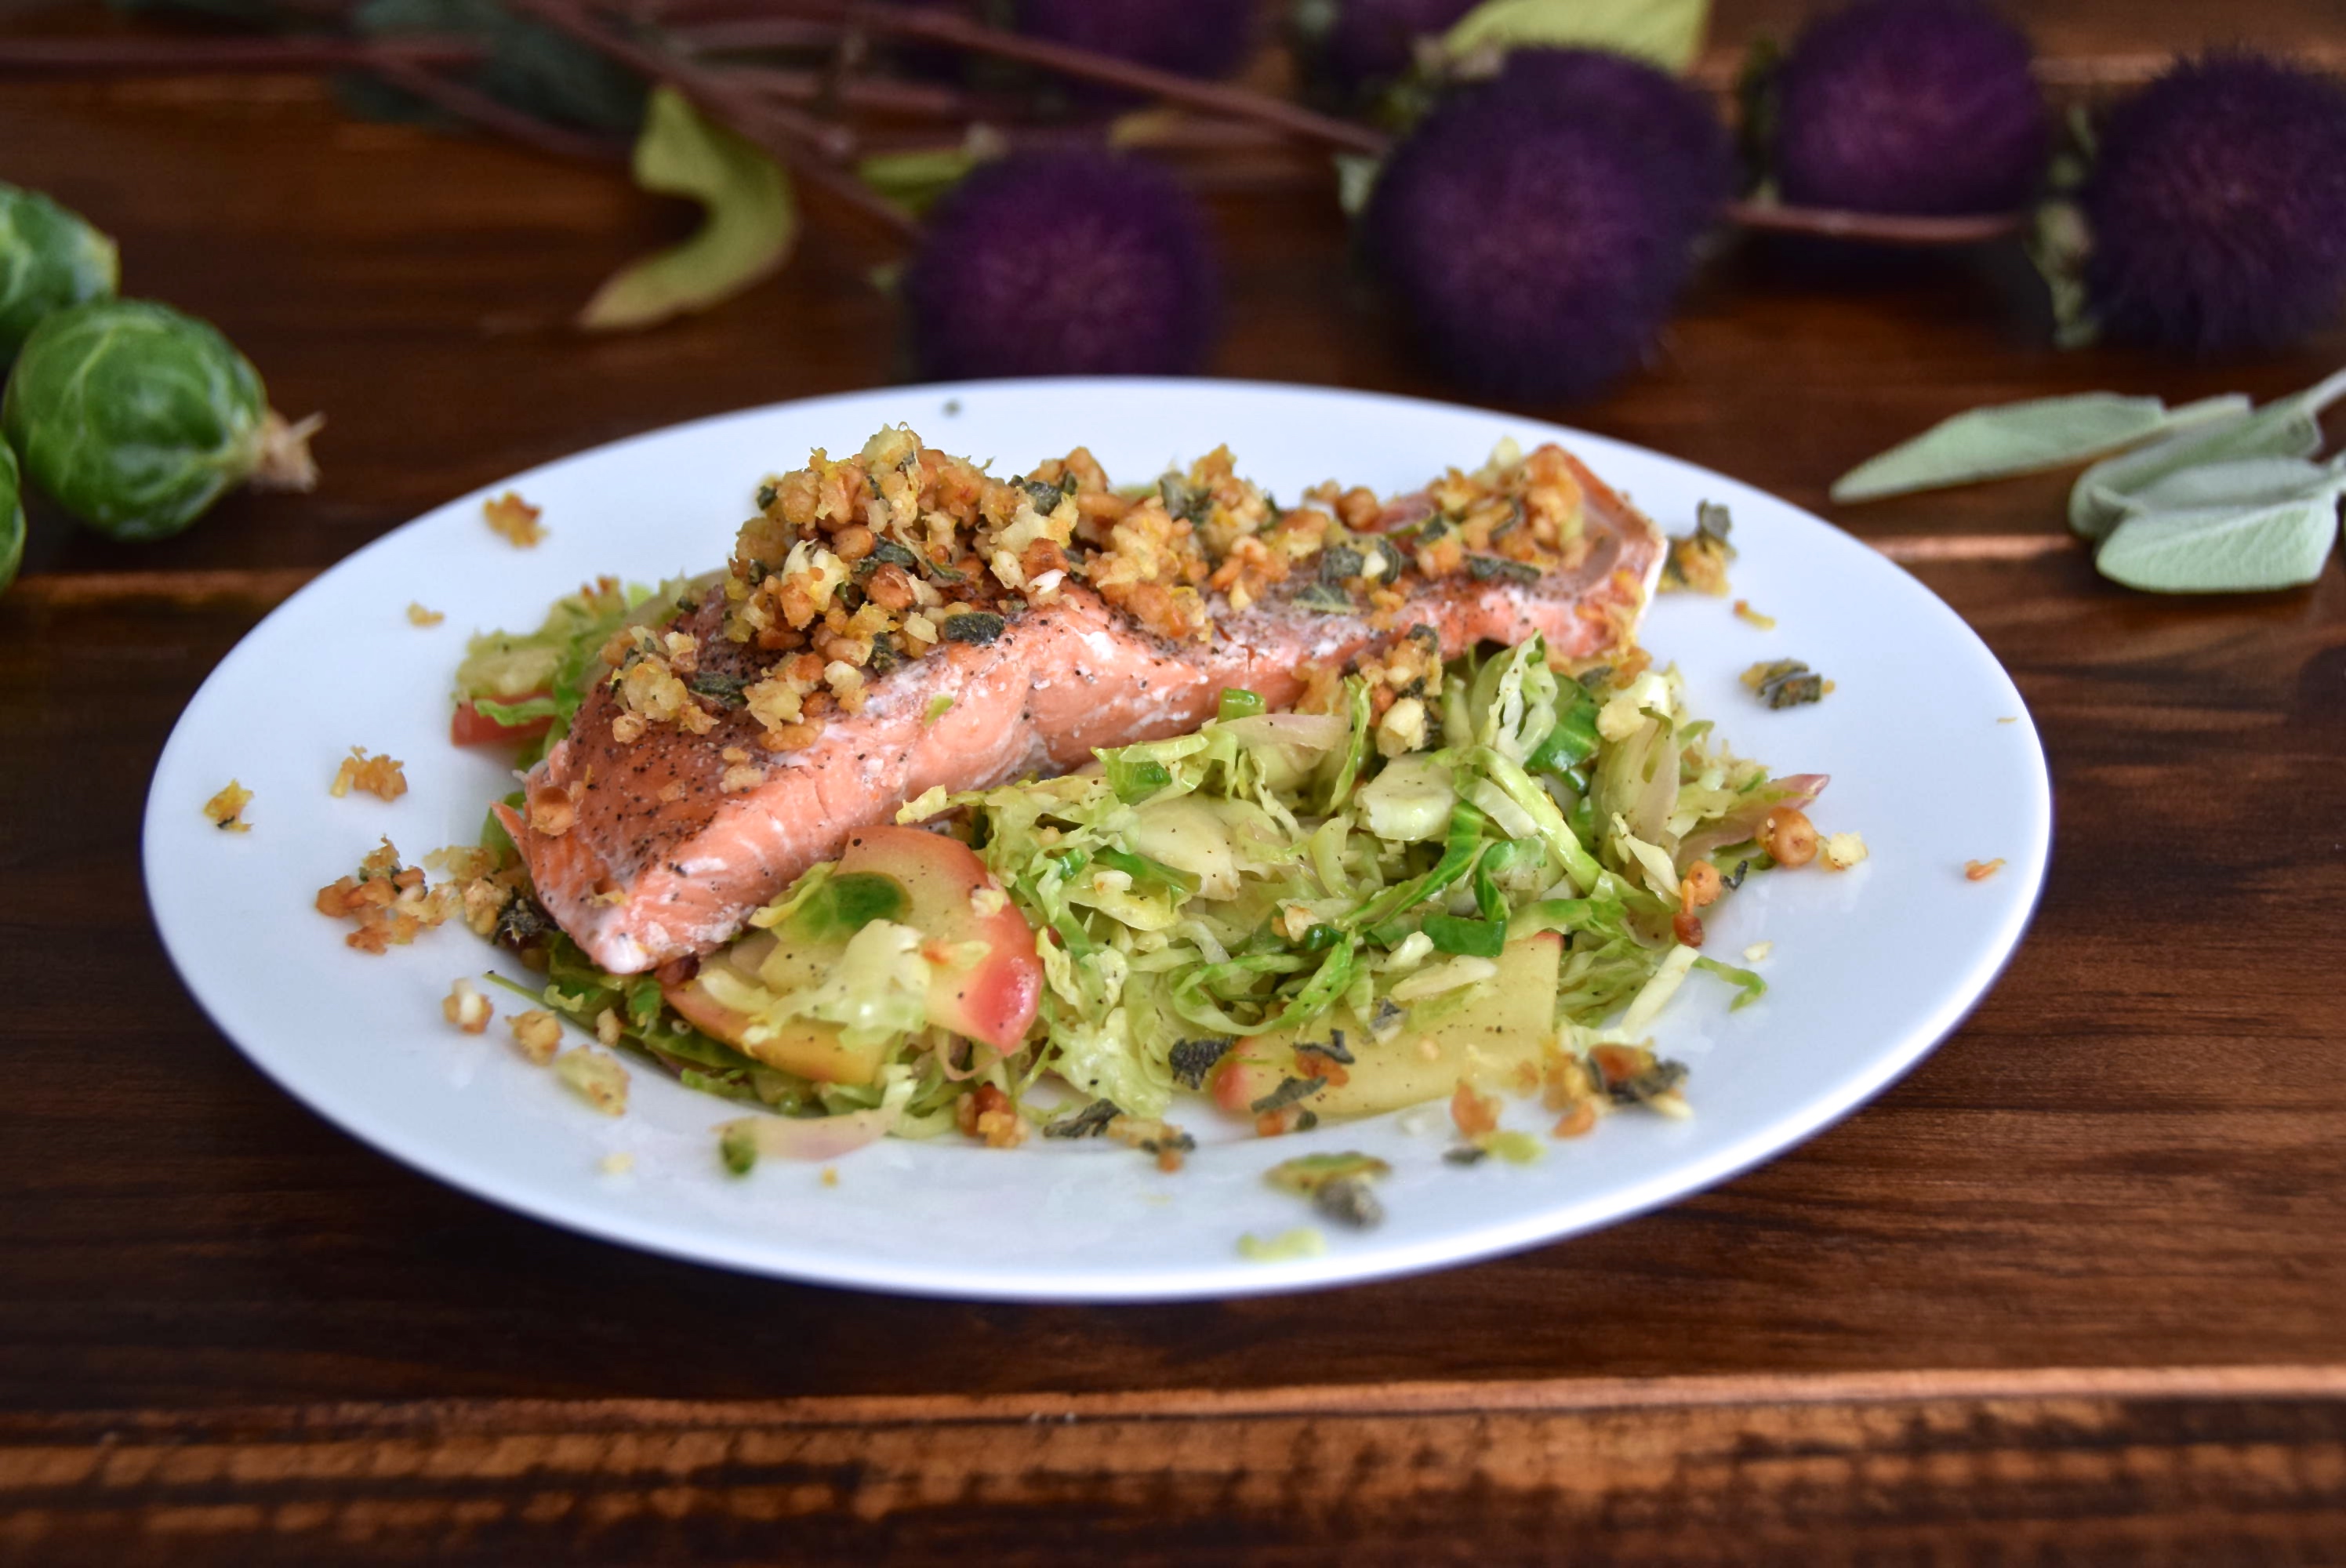
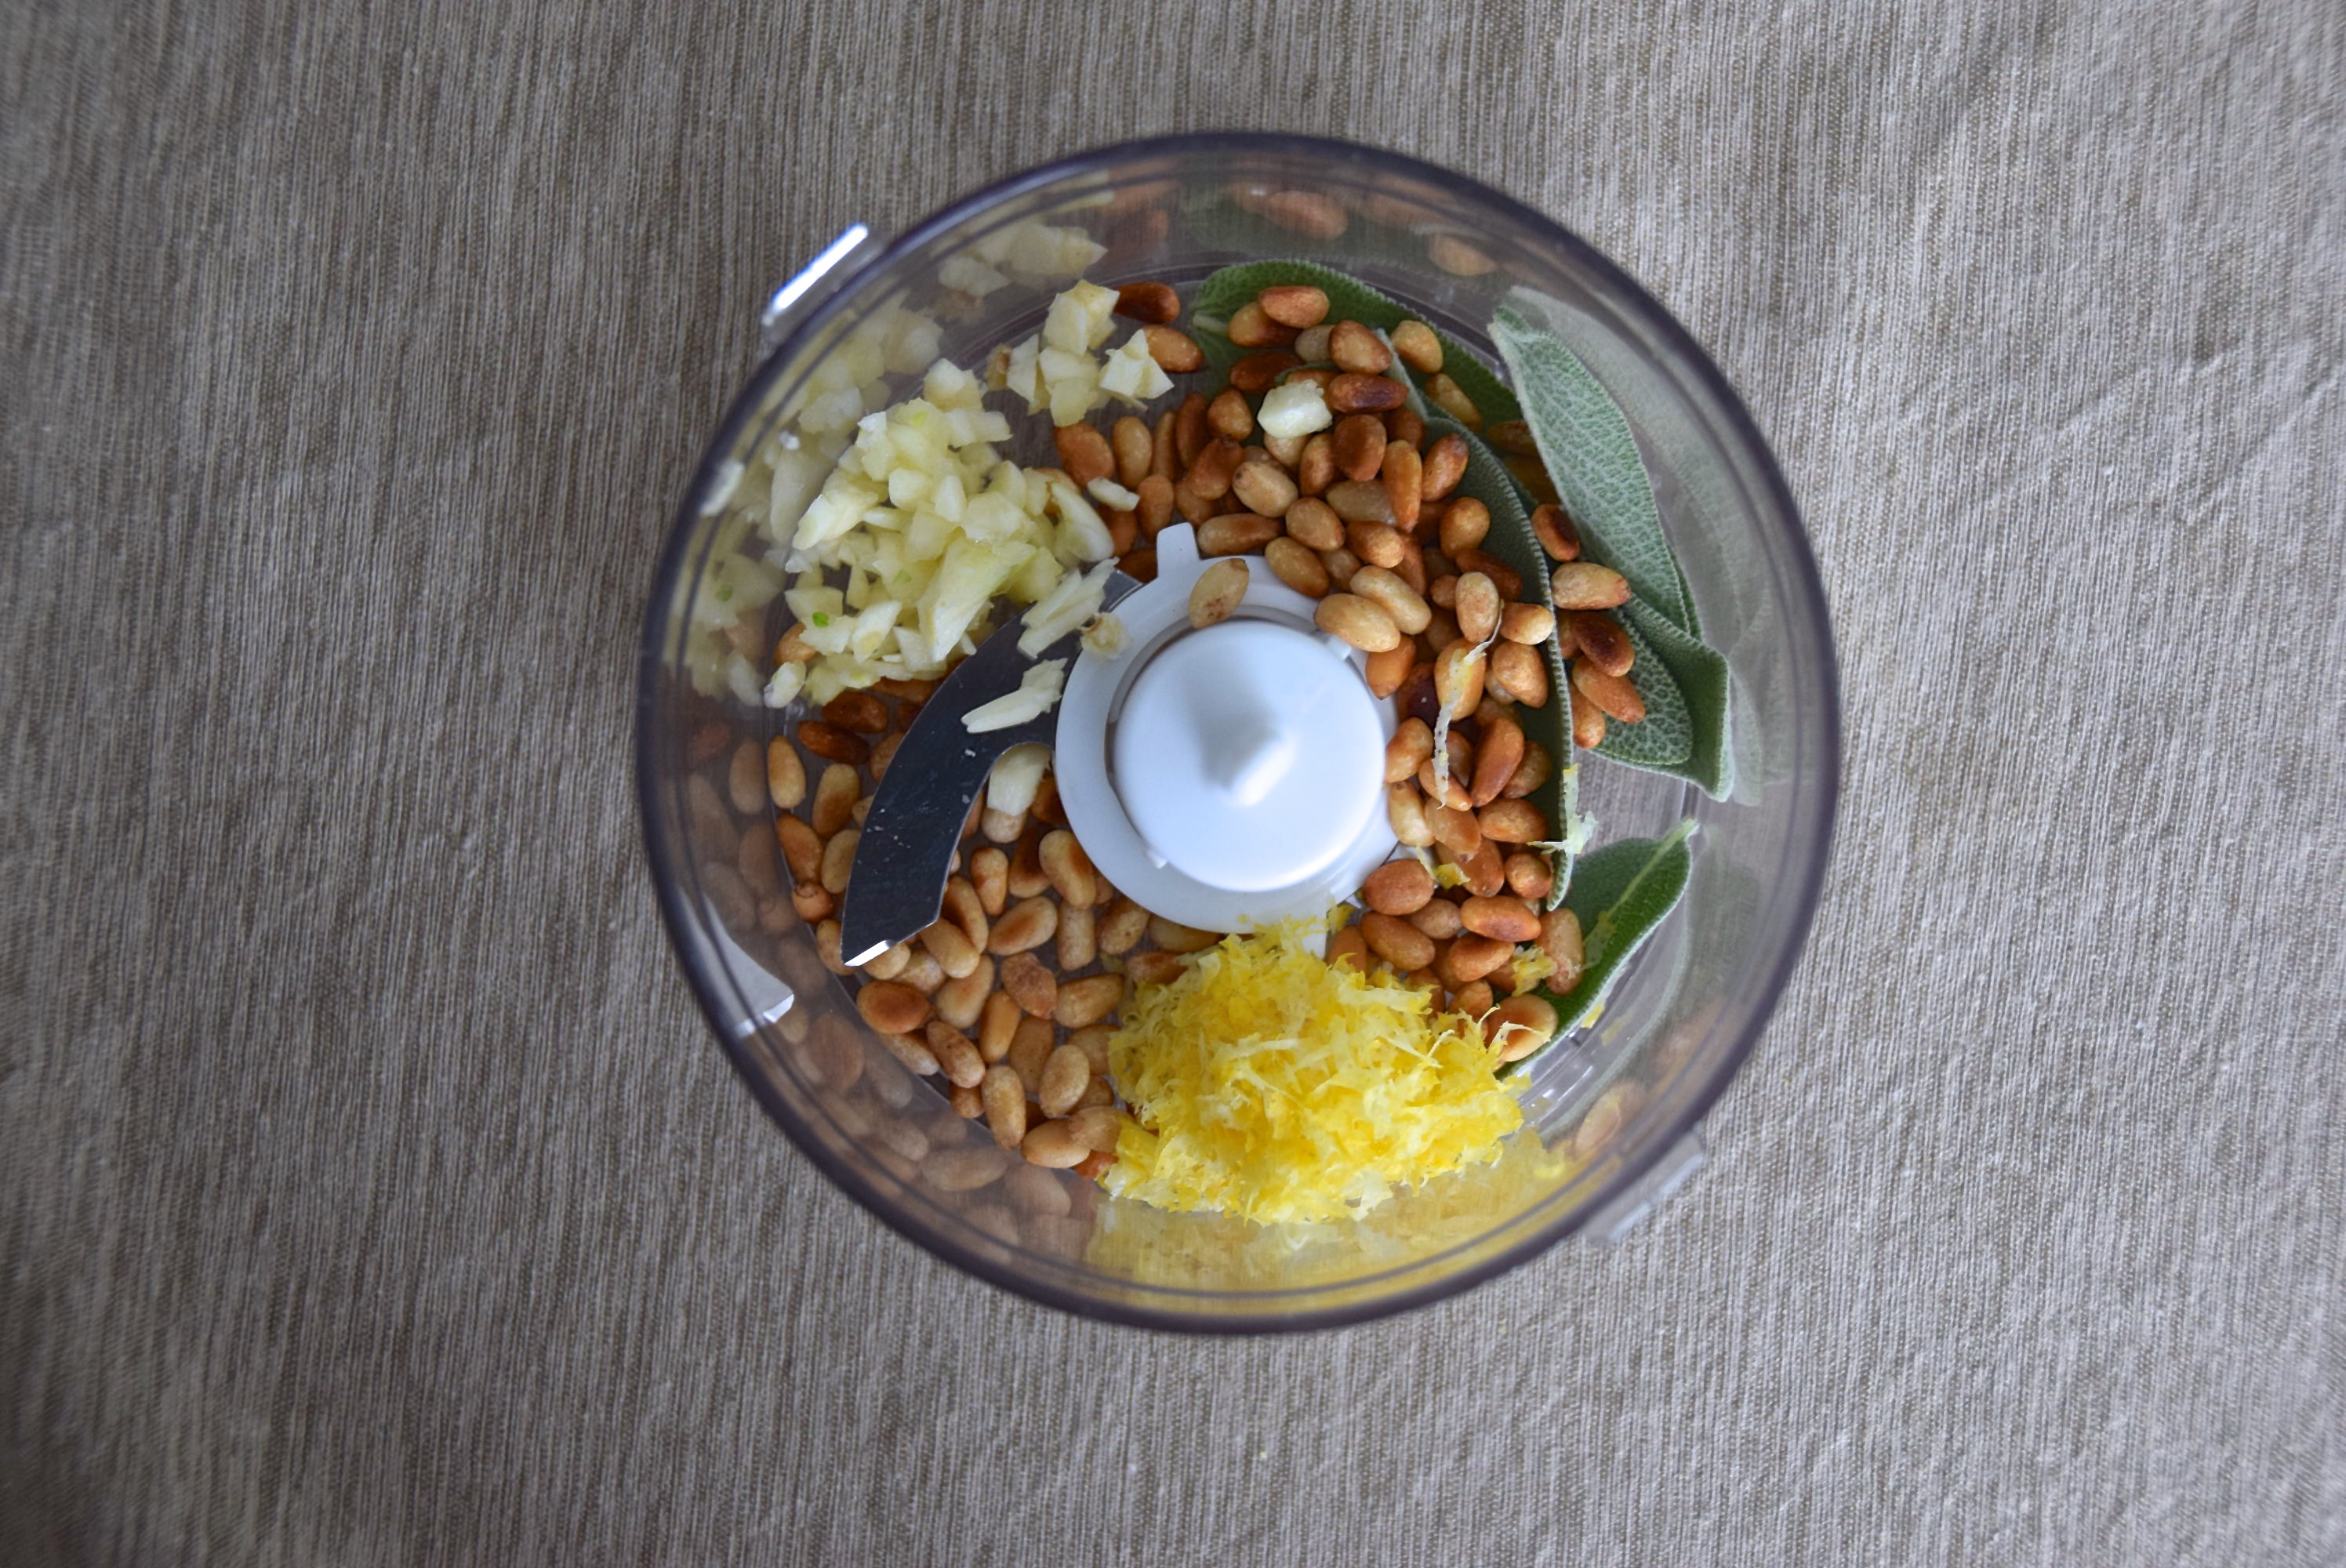
We highlighted the fall flavors of sage, pine nuts, apple, shallot, and brussels sprouts in this healthy salmon recipe. It’s pretty simple to make if you have the right tools. Start by combining all ingredients for the gremolata in a mini food processor.
dsc_0492
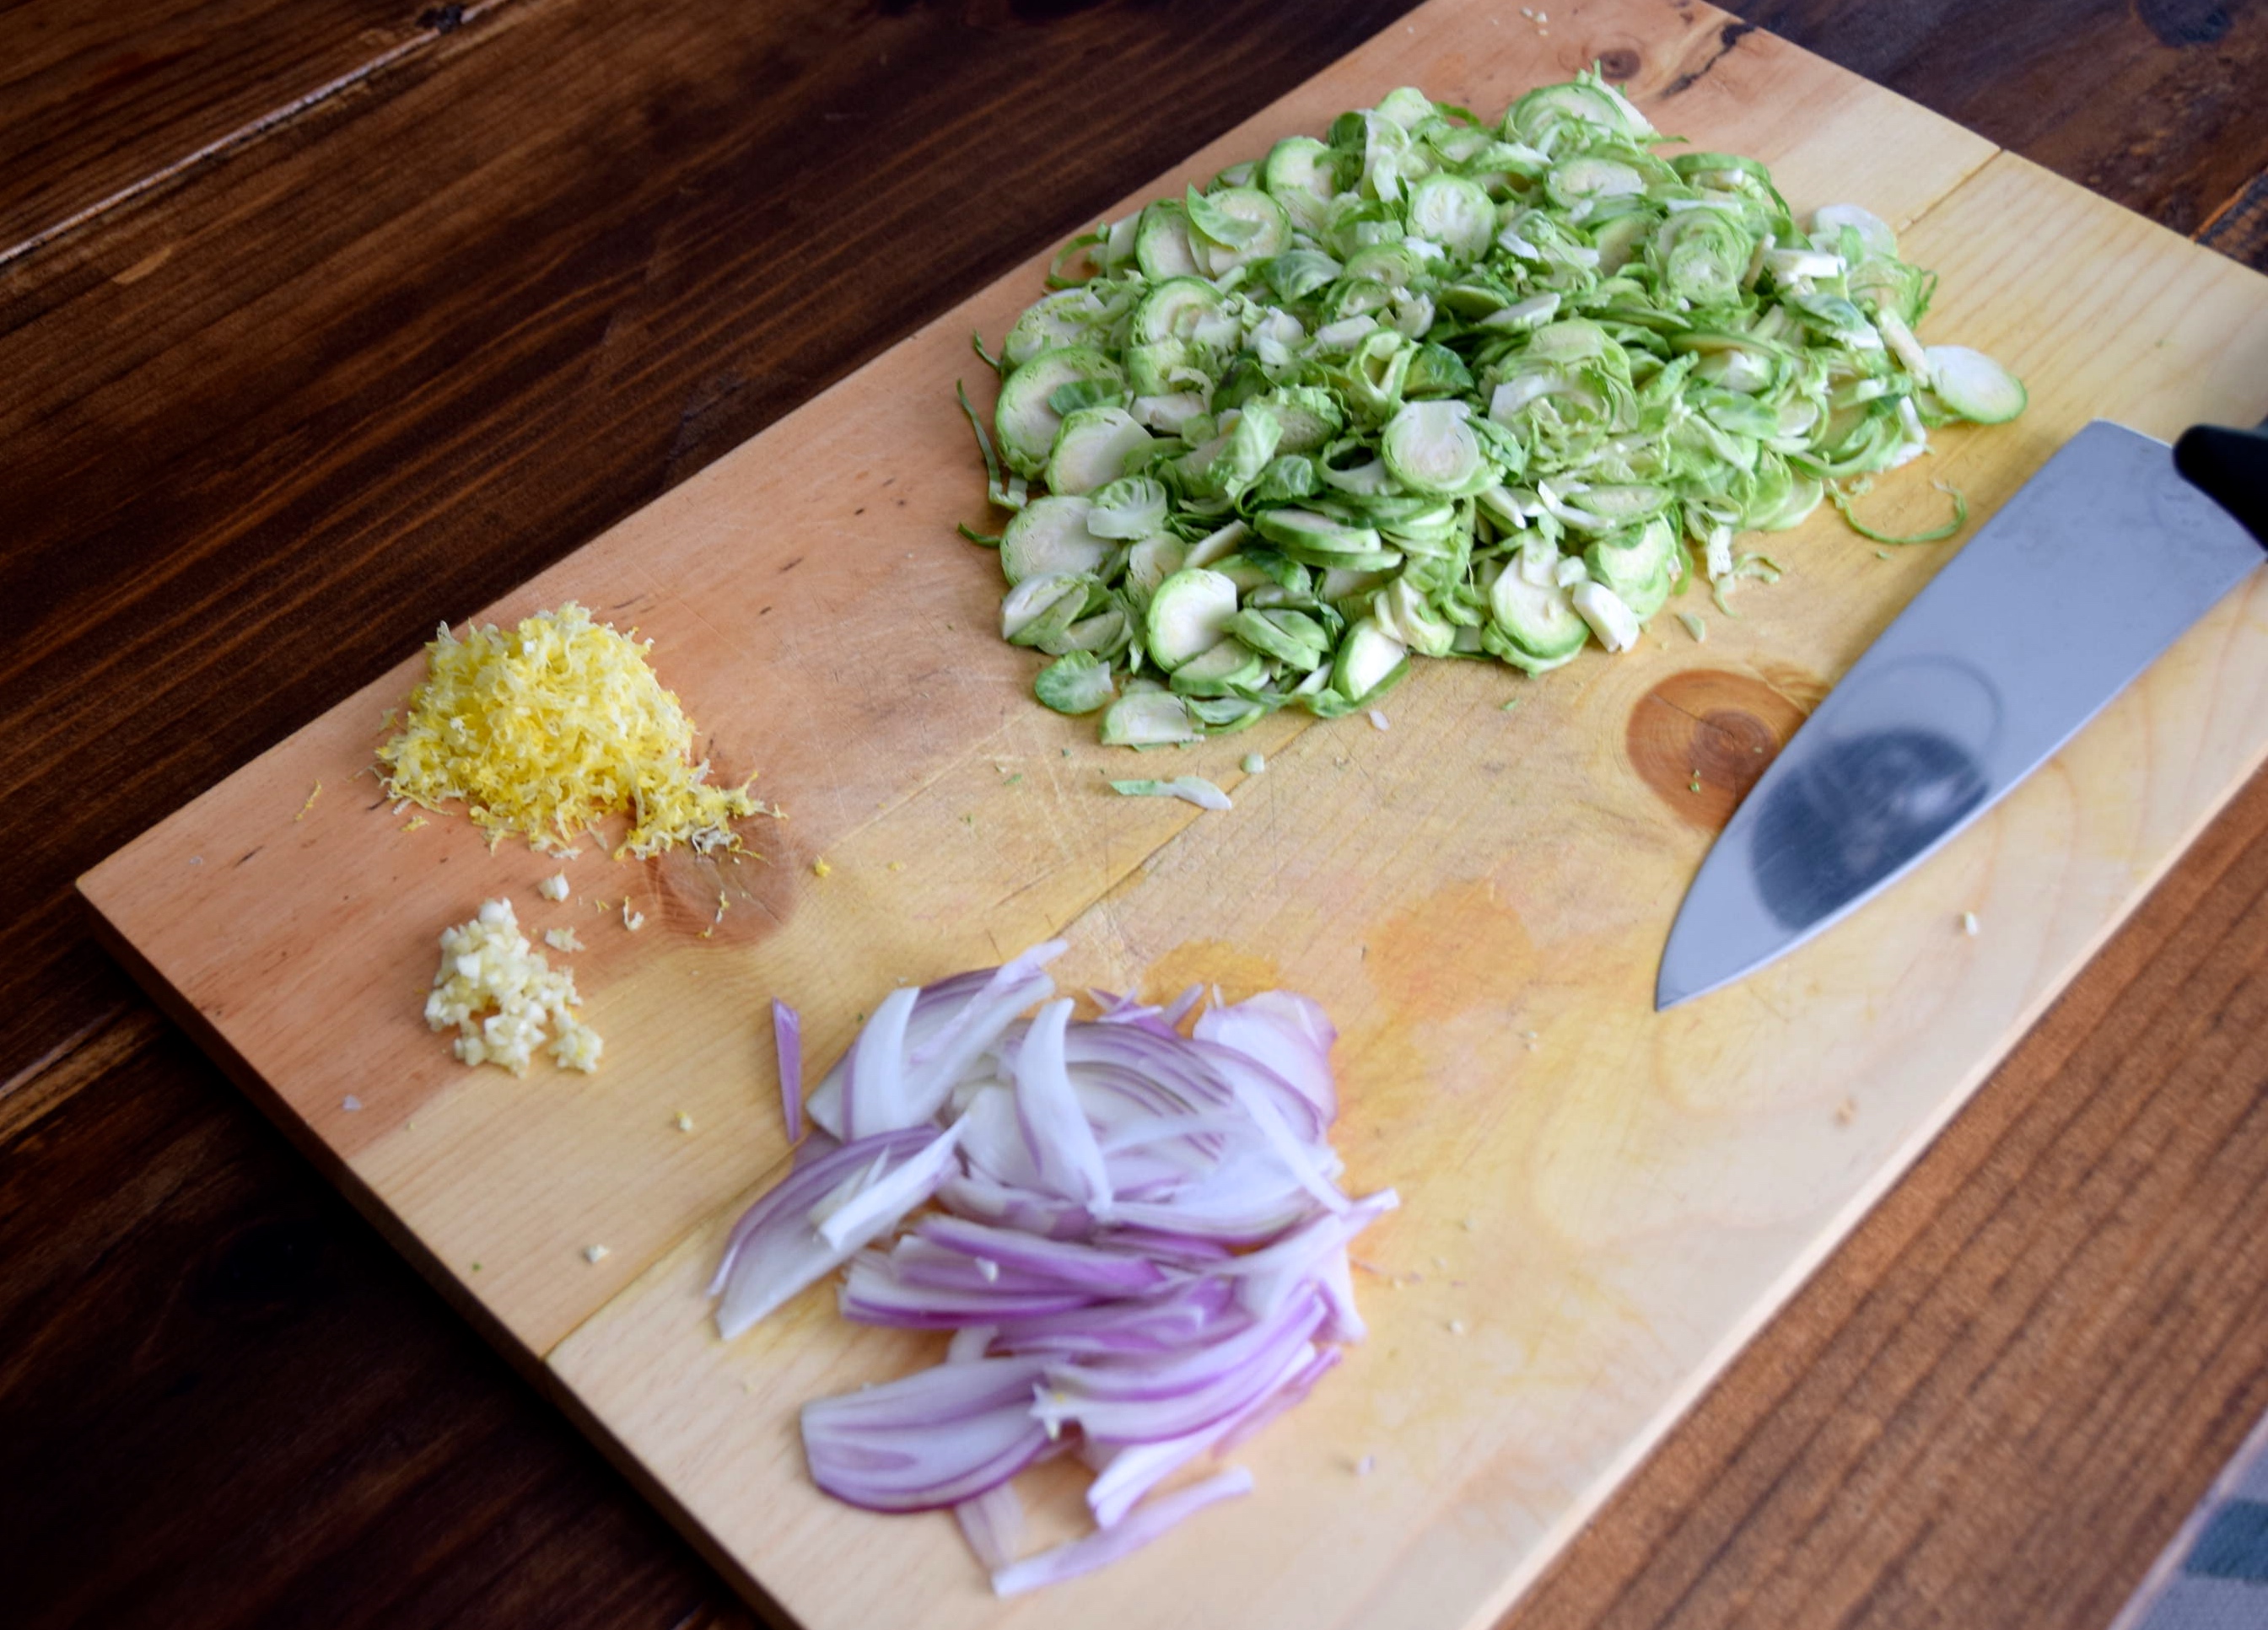
Then, prep all the ingredients for the brussels sprouts side expect the apples (you’ll do that right before adding them to the pan).

dsc_0536
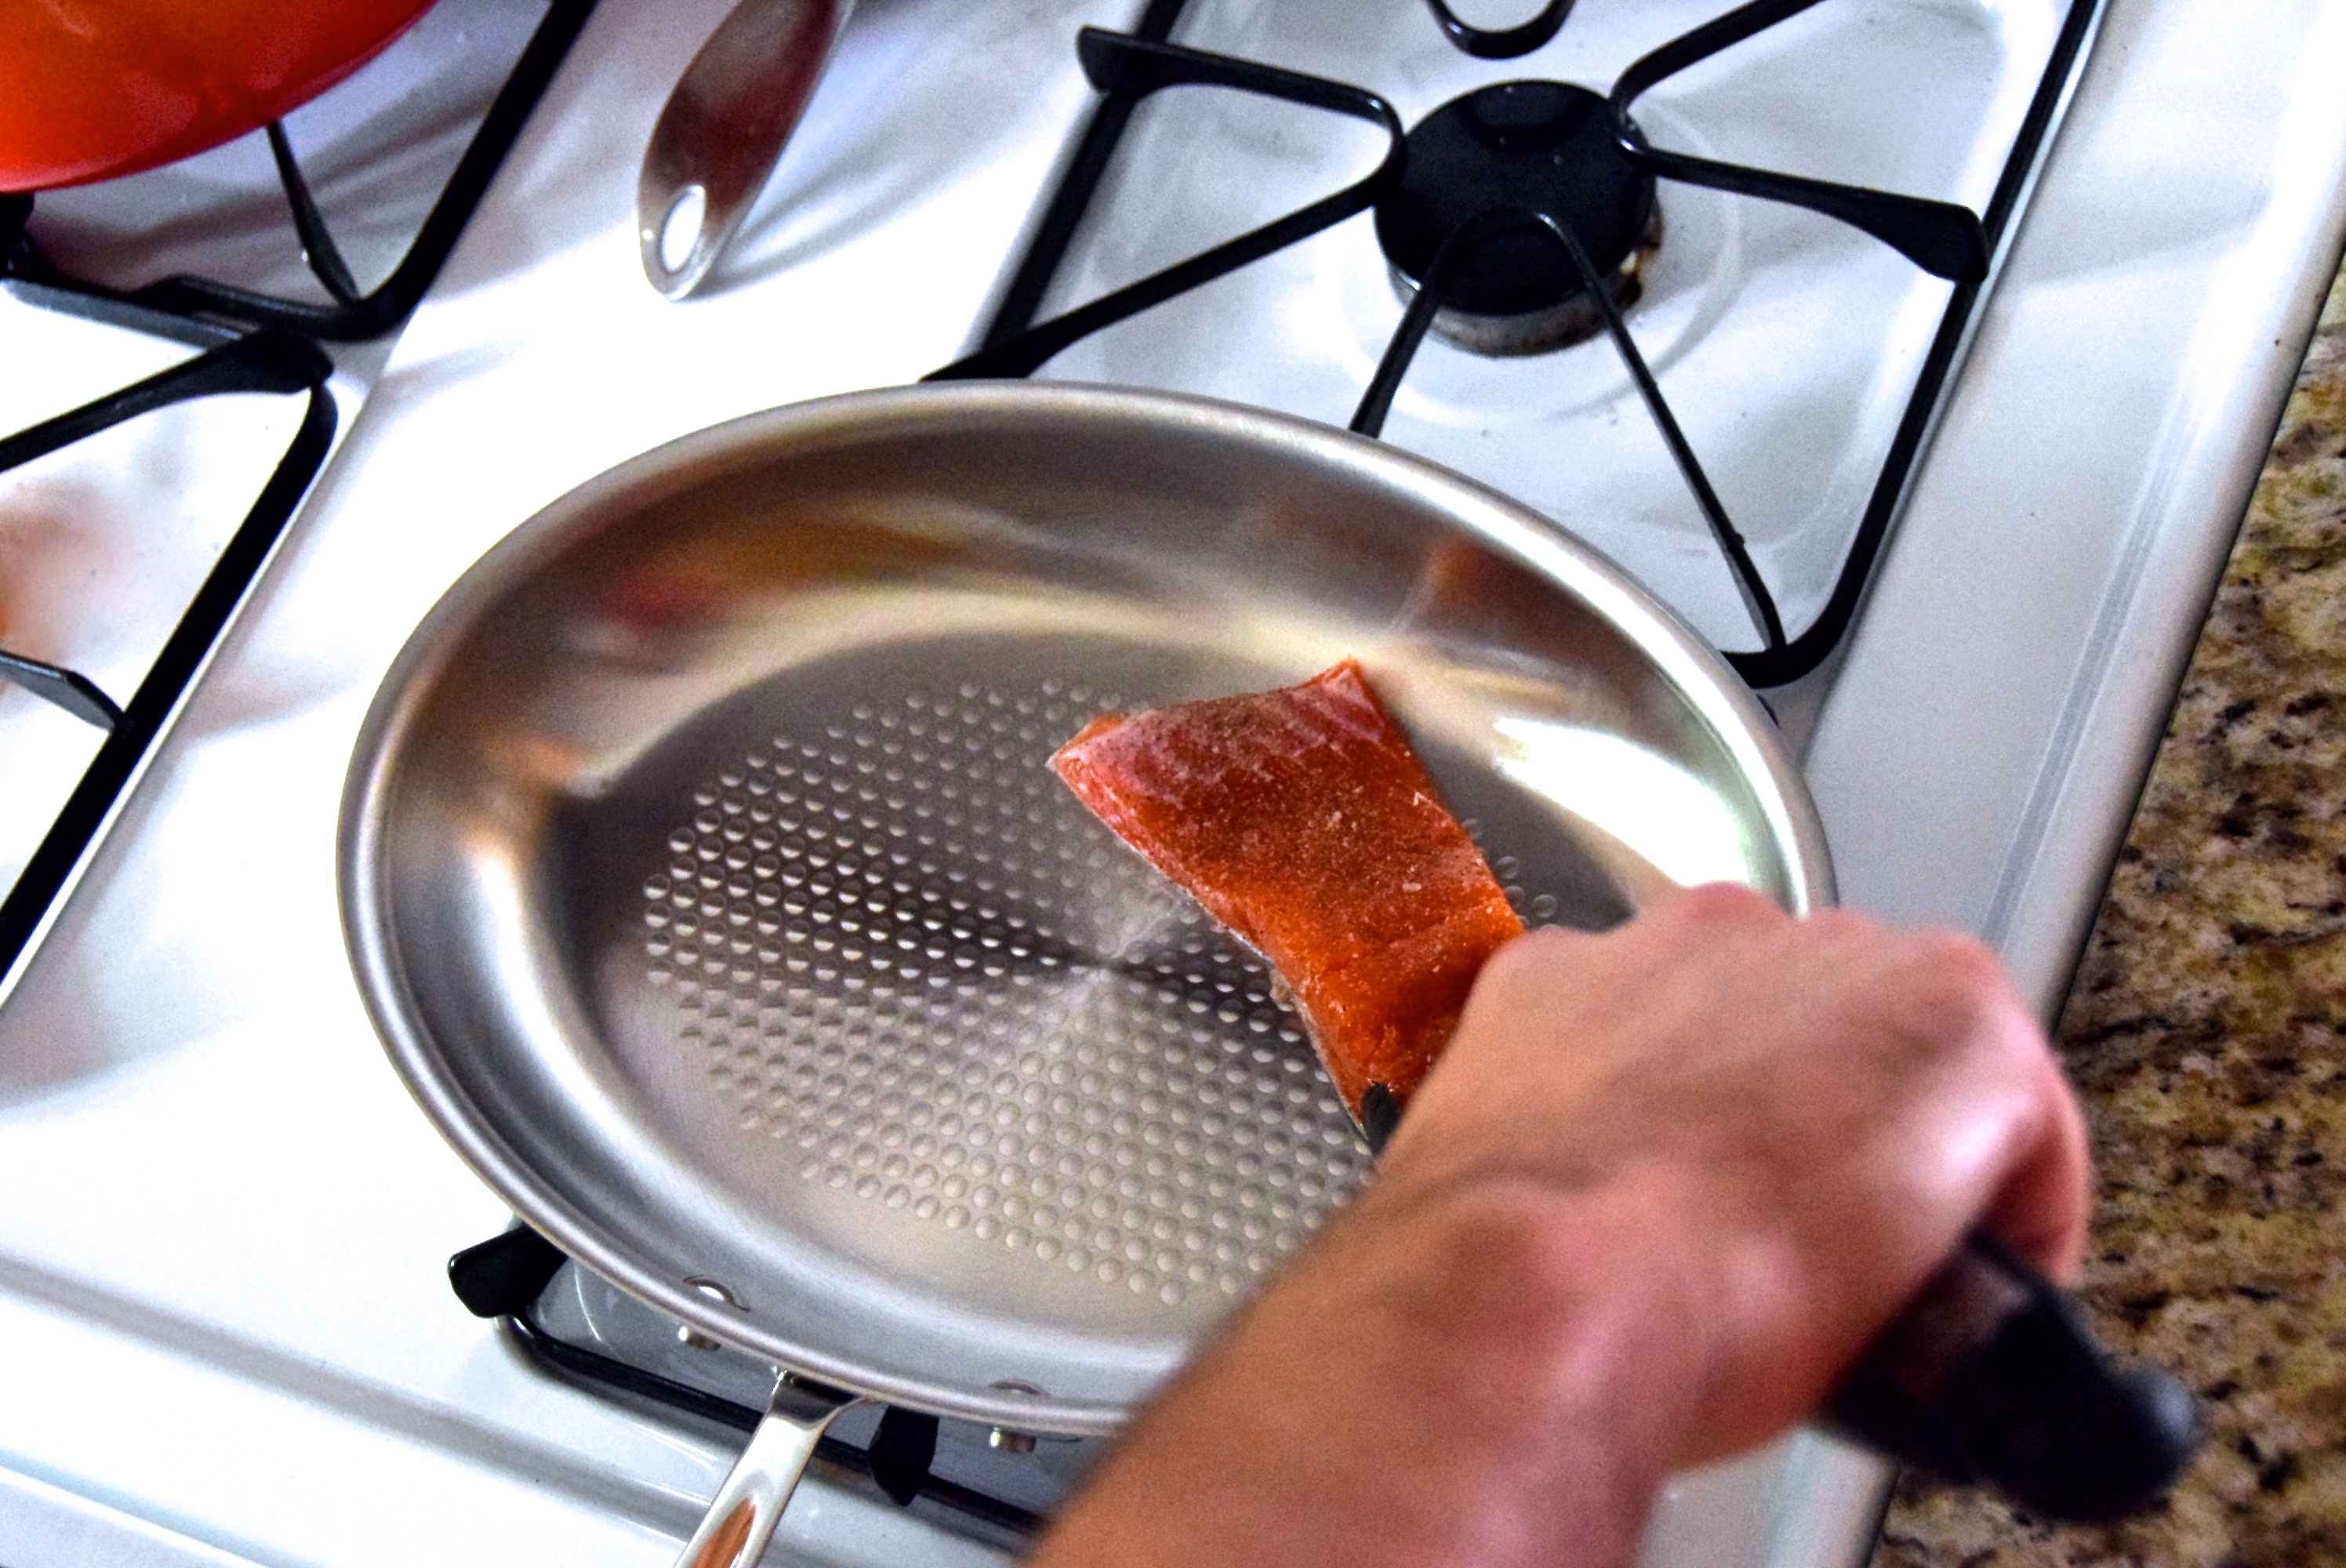
Heat the All-Clad d3 ARMOR Fish Pan and cook the salmon. Isn’t that pan pretty?

dsc_0516
After cooking the salmon, use the same All-Clad d3 ARMOR Fish Pan to make the brussels sprouts mixture. Plate the salmon on a bed of the brussels sprouts and top with the sage gremolata. This healthy seafood dish celebrates the nutty, sweet, and savory flavors of this wonderful fall season.

Pan Seared Salmon with Sage Gremolata

Served with Sautéed Brussel Sprouts, Apple, and Shallot

Prep Time: 20 min. Cook Time: 25 min.

For the Gremolata:

1 tablespoon fresh sage leaves

2 tablespoons toasted pine nuts

2 cloves garlic, minced

1 tablespoon lemon zest

For the Brussels Sprouts:

1 lb. brussels sprouts, stems and outer layers removed, thinly sliced

1/4 cup shallot, thinly sliced

1 garlic clove, minced

1 honeycrisp apple, thinly sliced half moons, then sliced again into quarters

1 tablespoon lemon zest

1/2 lemon, juiced

2 teaspoons kosher salt

For the Fish:

1 lb. (2- 1/2 lb filets) king salmon

Kosher salt

Black pepper

Olive oil

Preparation:

First, prepare the gremolata by placing the sage, toasted pine nuts, garlic, and lemon in a mini food processor. Pulse for about 10 seconds until combined. Set aside.

Slice the brussels sprouts, apple, and shallot. Set aside.

Preheat the All-Clad d3 ARMOR fish pan over medium heat and add 2 tablespoons of olive oil. Season the salmon generously with salt and pepper. Once the pan is hot, place the salmon in the pan skin side down and don’t move it around. Cook for 4 minutes, then flip the salmon. Cook for another 2 minutes. Turn salmon to the side and cook for another 1-2 minutes. Then, flip salmon on the other side and cook for 1-2 minutes until desired doneness is reached.

Remove salmon from pan and allow to rest covered with foil as you make the brussels sprouts.

Prepare brussels sprouts using the same All-Clad d3 ARMOR fish pan. Preheat pan over medium heat and coat with olive oil. Add shallot and stir with a wooden spoon, scraping up any brown bits leftover from the fish. Cook for about a minute. Add the brussels sprouts and stir, coating the brussels sprouts in oil. Cook for about 2 minutes. Add 1 teaspoon of kosher salt and continue to cook for another 4 minutes. Stir in the apple and lemon zest and cook for 3 minutes. Finally, add the garlic and lemon juice and stir to combine, cooking for another 1 minute. Finish with an additional 1 teaspoon of kosher salt.

Plate the brussels sprouts first and lay the salmon filet atop. Sprinkle the entire dish with sage gremolata. This fall seafood dish is a real stunner when it arrives at the table.

GIVEAWAY:

We used the All-Clad d3 ARMOR Fish Pan to create the recipe shared in this post. For one lucky reader, it’s yours for FREE (retail price $199.95).

image002


Photo Courtesy of All-Clad

To Enter:

1. Leave a comment on this post

For additional entries:

2. Share this post link on Facebook, then come back and leave a SEPARATE comment letting us know that you did

3. Share this post link on Twitter, then come back and leave a SEPARATE comment letting us know that you did

4. Share this post link on Instagram, then come back and leave a SEPARATE comment letting us know that you did

5. Share this post link on Pinterest, then come back and leave a SEPARATE comment letting us know that you did

(…and yes, we will check that you actually shared the link!)

Giveaway open to US residents only. Maximum 5 entries per person. Giveaway ends 10/16/16 at 11:59pm CST and winner will be announced on this blog post the next day. Giveaway is in no way sponsored, endorsed, or administered by, or associated with Facebook, Twitter, Instagram, or Pinterest.

Get Your Kicks (#Route66)


dsc_2349
This post is sponsored by ALIVE Influencer Network + The Missouri History Museum

This week we were invited to a private tour of the new Route 66 exhibit at the Missouri History Museum here in St. Louis. The is exhibit is free to the public, and the history museum staff did an excellent job in conveying the significance of Route 66 to St. Louis history.

dsc_2297
Through this post, I hope you learn a little more about St. Louis history and the impact Route 66 had on the St. Louis culinary scene.

dsc_2291
One of my favorite parts of this exhibit was the section about FOOD (go figure). Located right along Route 66 at Big Bend and Clayton Road was The Parkmoor, St. Louis’ first carhop restaurant! Pictured here is a uniform the first carhops in St. Louis would wear. The concept of carhops was just catching on in America, and the Parkmoor brought this craze to St. Louis in 1930. After many years of success, the Parkmoor struggled to compete with other St. Louis restaurants, and closed in 1999. A Walgreens now stands in the old Parkmoor space.

One place I know that hasn’t changed much since it opened in 1941 along Route 66 is Ted Drewes. For those of you that haven’t visited St. Louis, Ted Drewes is arguably the best custard on the planet. On any given night of the week, crowds flock to Ted Drewes for delicious frozen treats. It’s a family tradition of ours to stop by on the way home from Cardinals games (and also ironically after we go to the dentist…). The Route 66 exhibit boasted the original Ted Drewes uniform worn by Mrs. Drewes senior herself.

dsc_2309
Another delicious stop along Route 66 was (and still is!) Carl’s Drive In. Freshly brewed root beer, greasy burgers smashed on a flat top grill, and a limited number of spinning bar stools. Located close to the Kirkwood/Webster Groves border, I grew up knowing to always sit on the Kirkwood side. I wouldn’t want to be caught dead in our rival high school’s seats across the way. Just like Ted Drewes, Carl’s is a must-eat place in St. Louis.

img_6176
The history museum did a great job of providing information about other St. Louis restaurants, including Steak n’ Shake:

dsc_2326
Weary travelers were bound to run into this distinct sign along Route 66, illuminating the way to a good night’s sleep.

dsc_2317
The original Chase Park Plaza sign is also on display, and was one of my favorite parts of the exhibit. This original Chase Park Plaza sign was first displayed in the early 1940s. The Missouri History Museum restored this sign for the exhibit, and it is simply a showstopper. The 500-room Chase Hotel opened in 1922, then in 1928 the 28-story Park Plaza was built right next door. In 1947, the two properties merged to form the Chase Park Plaza.

dsc_2320
I loved these maps. It was fascinating to see where our house is in relation to Route 66. Did you know that they wanted Route 66 to be Manchester Road but it really ended up being Watson? Watson wasn’t as paved and less traveled than Manchester, but it ended up being Route 66!

dsc_2308
This airsteam in this exhibit seemed a little too tight for real humans to fit inside, but it sure was a popular way to travel along Route 66 back in the day. When you peak inside the one pictured below, you’ll see a full functioning kitchen, dining area, and living area. Nowadays, when I see airstreams, the first thing I think of is: food truck!

dsc_2332
Overall, the Route 66 exhibit at The Missouri History Museum was a great experience. I had no idea the culinary history found along this winding road would be so rich. Although some iconic stops along Route 66 are gone, others live on as some of St. Louis’ most loved landmarks.

dsc_2303
Near the end of the exhibit, there is a collection of pictures comparing St. Louis “then and now.” I’m obsessed with this first photo, of an old St. Louis sign welcoming travelers of Route 66 to our great city.

dsc_2300
If you’re in St. Louis, this is an exhibit you won’t want to miss. It is free to the public and runs through July 16, 2017.

dsc_2337
Get your kicks.

Apple Galette

Apple Galette

We’re having some major yard and deck work done at our house. It’s taken some time already, and will take even more time to complete. So often, I just want to fast forward in life. Fast forward to the yard being complete and seeing beautiful grass instead of mud as we sit on our deck and watch the sunset. Fast forward to REAL fall temps when the leaves have turned brilliant shades of red and gold. In the past I’ve wanted to fast forward to graduation, to marriage, to moving, to so many things.

Although it’s fun (sometimes daunting) to cast visions for the future, I think there is great joy to be found in the here and now that can easily be missed. In the “our yard’s a mess” stage it’s tempting to compare ourselves to others and focus only on what is to come rather than opening our eyes to what currently is. I think Lin-Manuel Miranda says it best: “Look around, look around at how lucky we are to be alive right now!” Life is fleeting and ought not to be missed. Embrace the transition of the season you might currently be in, knowing that it brings enough in itself to be valued.

The temperatures might still be warm, but before fast forwarding and wishing away each day to a cooler one, embrace the now. And the now is: apple season! Bring on the apple pie, apple crisp, apple butter, and apple galette!

dsc_1936
An apple wha? What? According to good ol’ Mirriam-Webster, a galette is “a flat round cake of pastry often topped with fruit.” If a tart and a pie had a child, I think it would be a galette. The dough is like a pie crust, but you eat it more like a tart, with the fruit beautifully exposed. You could even use store-bought dough, but this dough recipe is super simple and I just know you can make it from scratch. You got this! Plus, in this recipe there is cinnamon in the dough to give it even more autumnal goodness. I don’t think you can buy that.

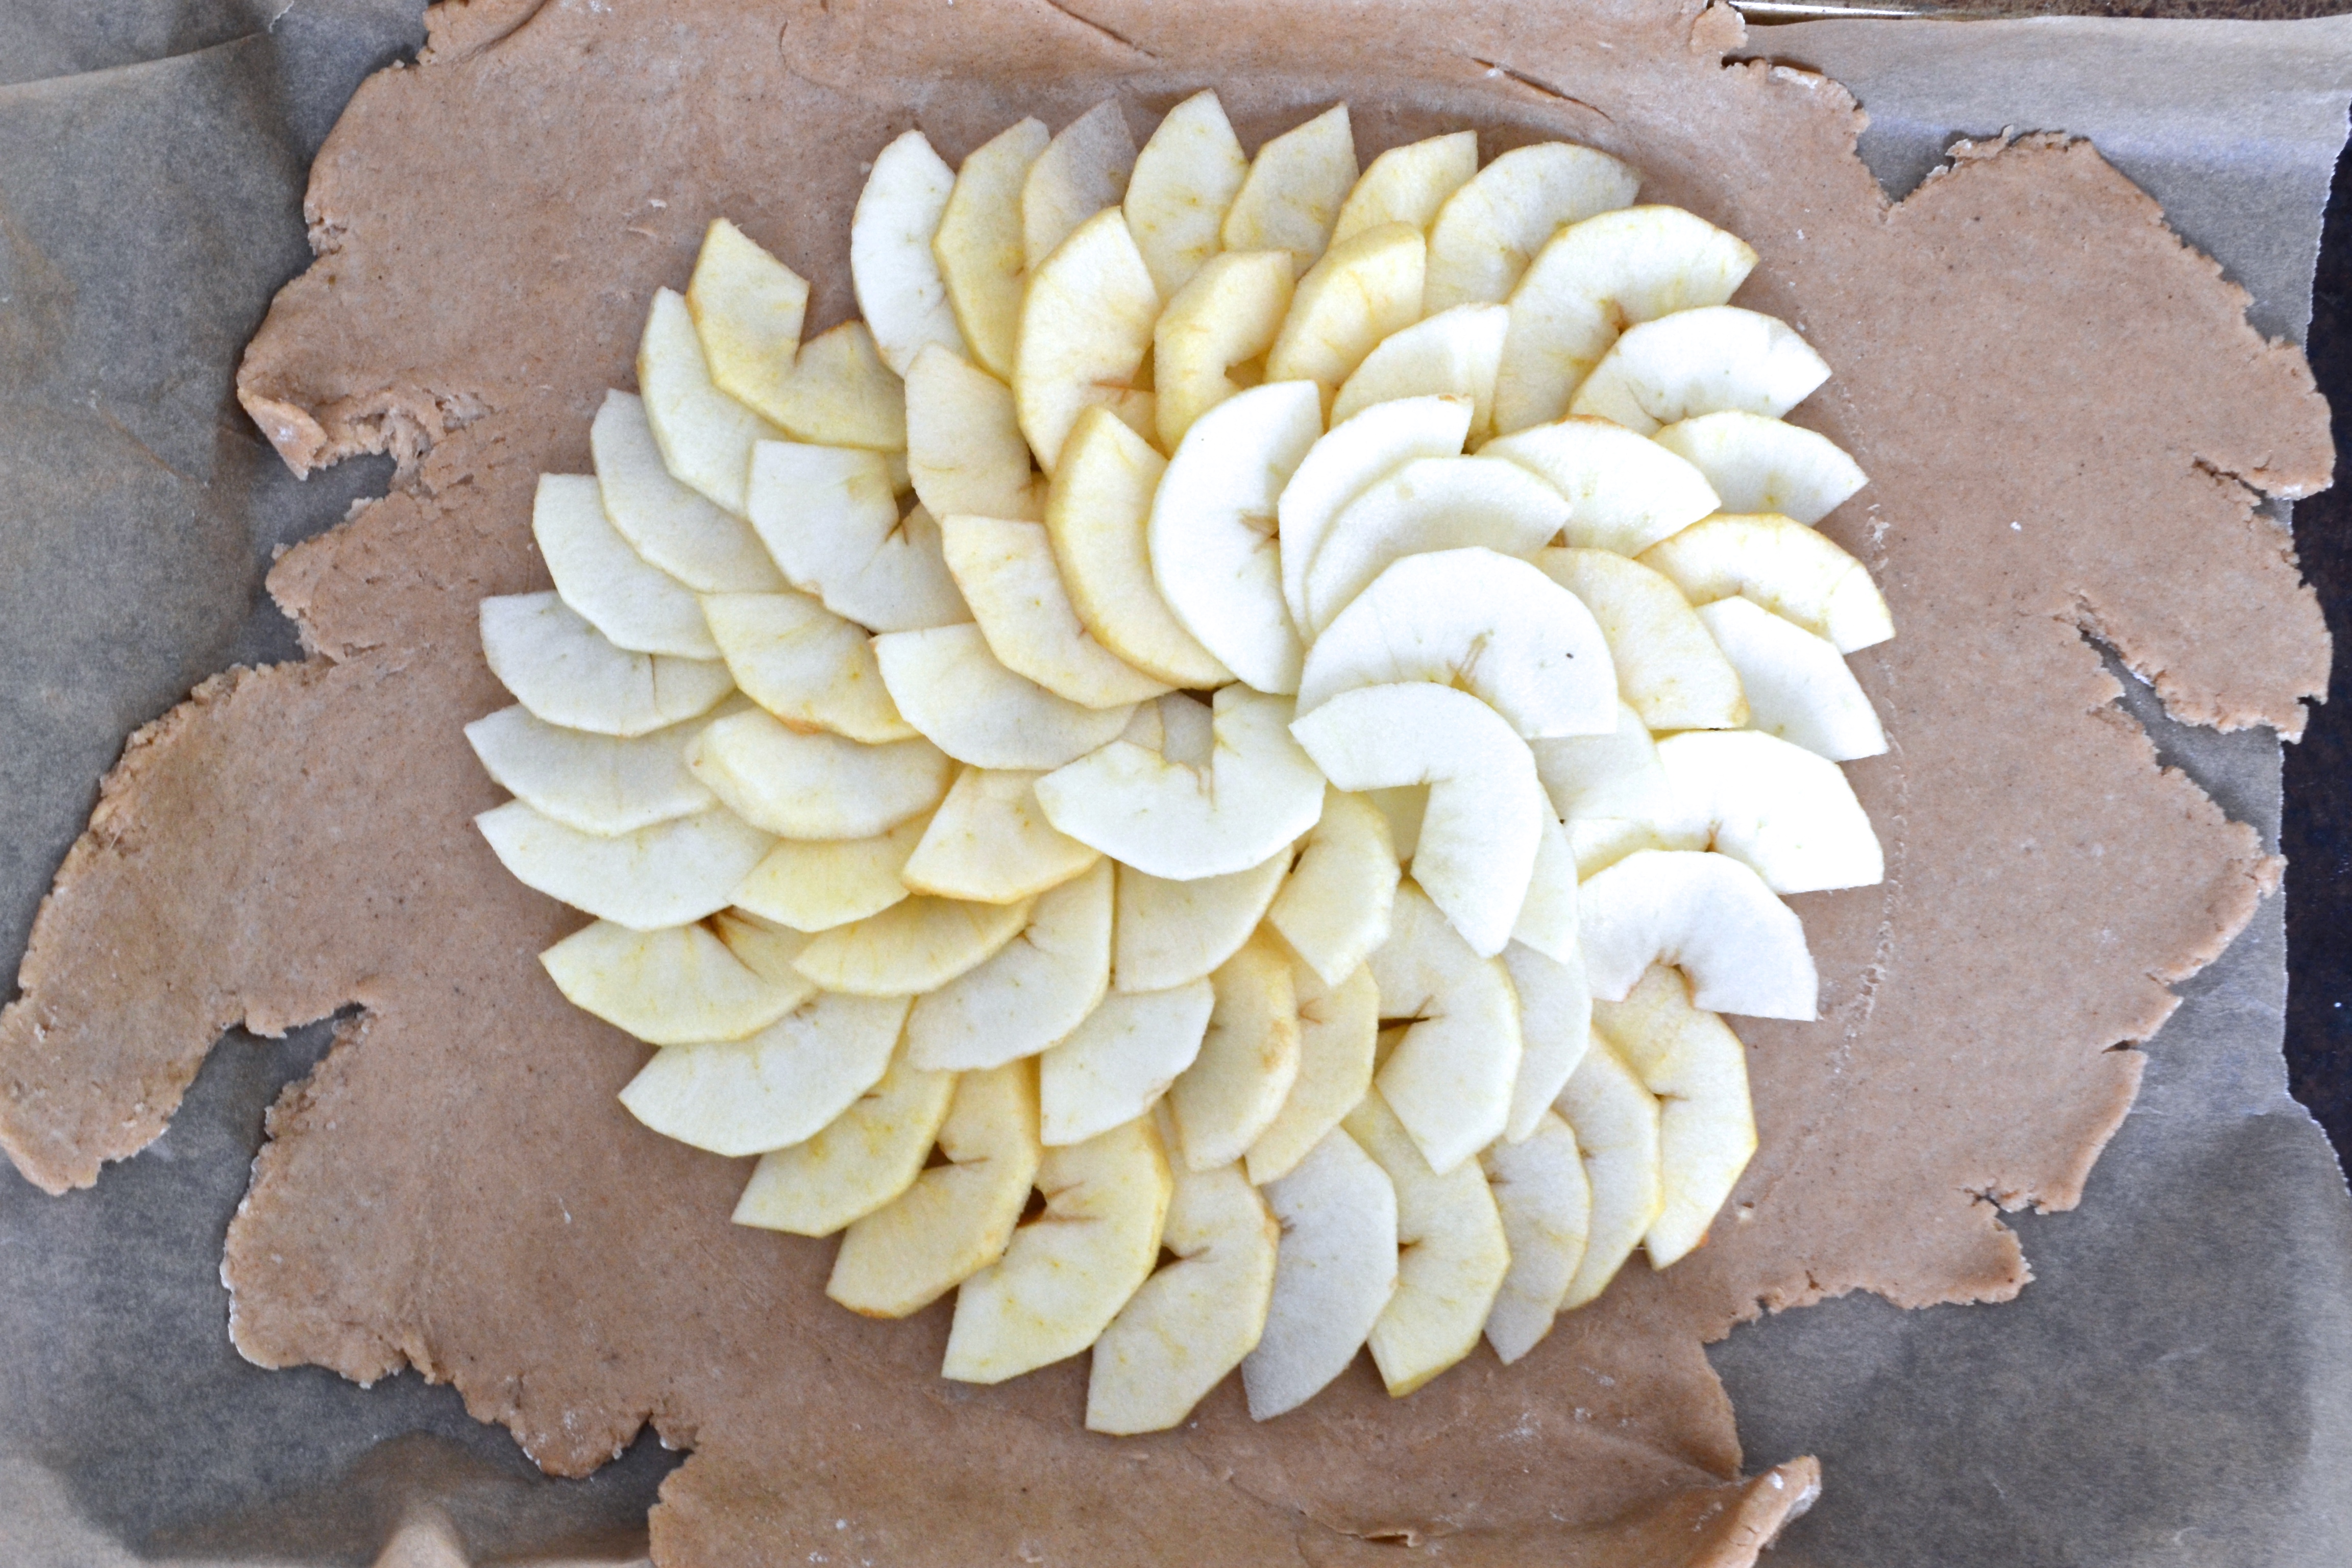
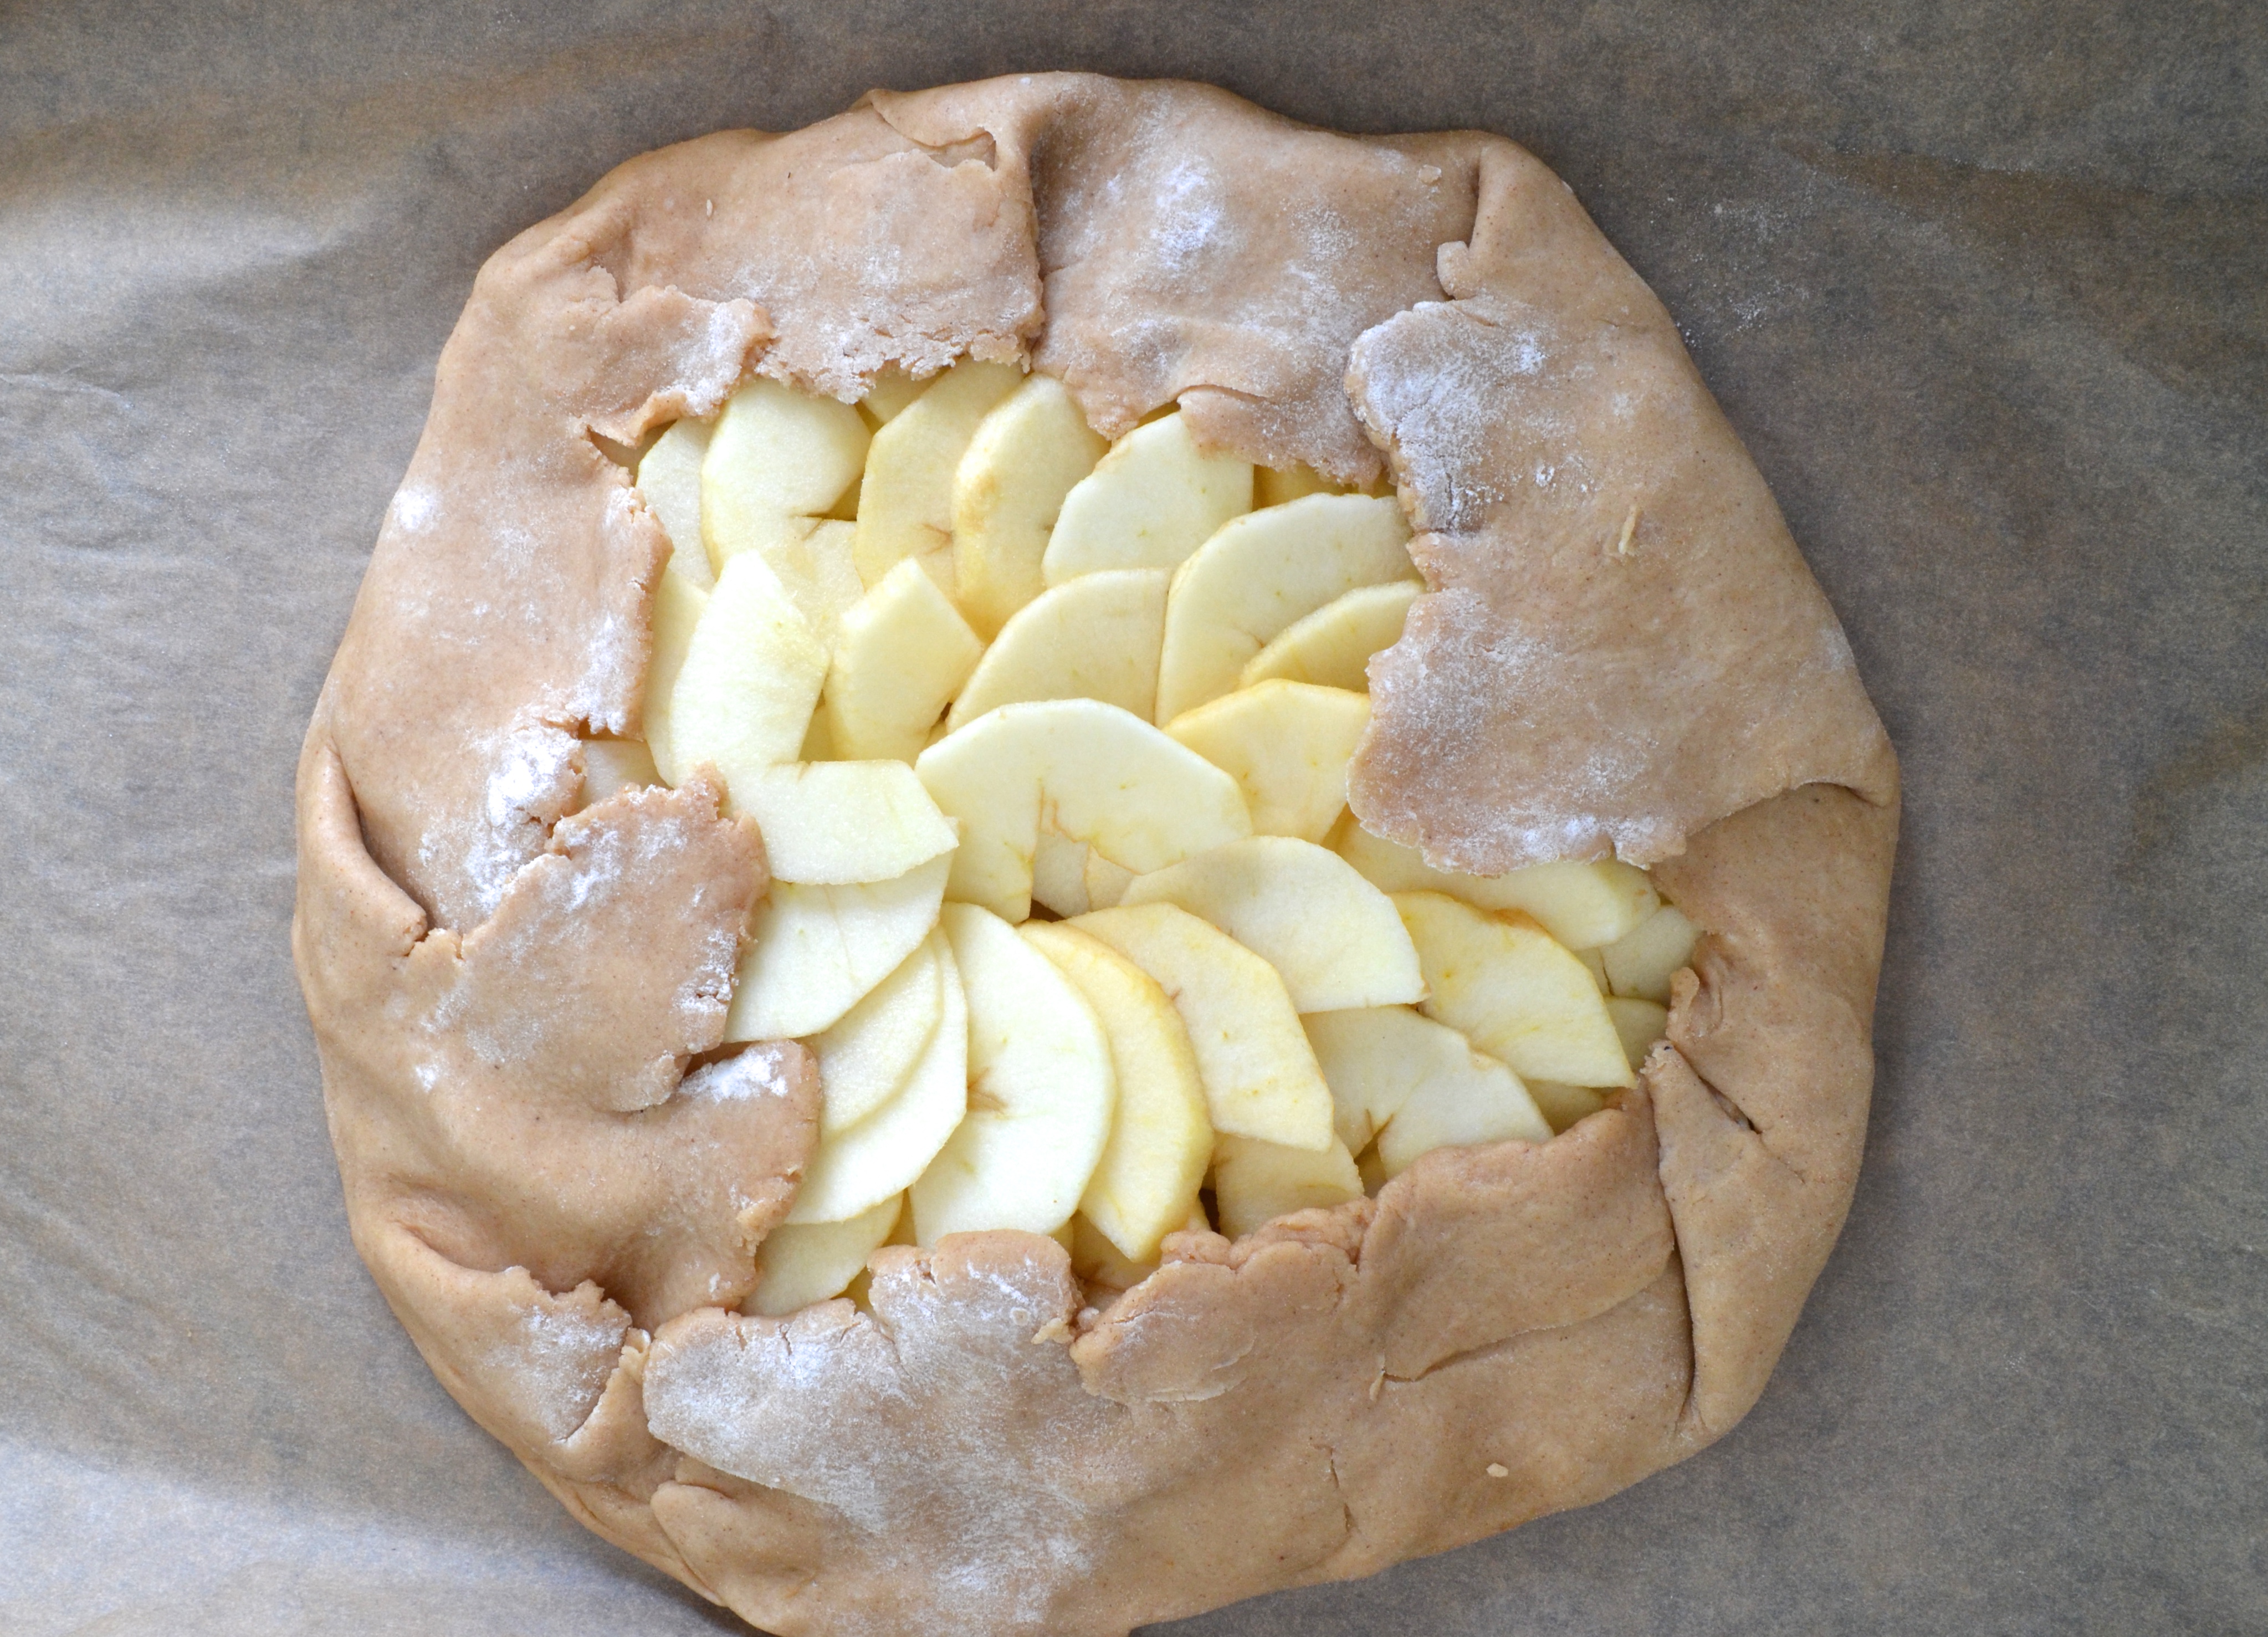
First, make the dough and roll it out. Then, lay the apples in a beautiful arrangement on the dough.

dsc_1861
Next, fold the dough loosely over the apples to give it a rustic look. Pinch together dough as needed to eliminate any major creases or holes.

dsc_1864
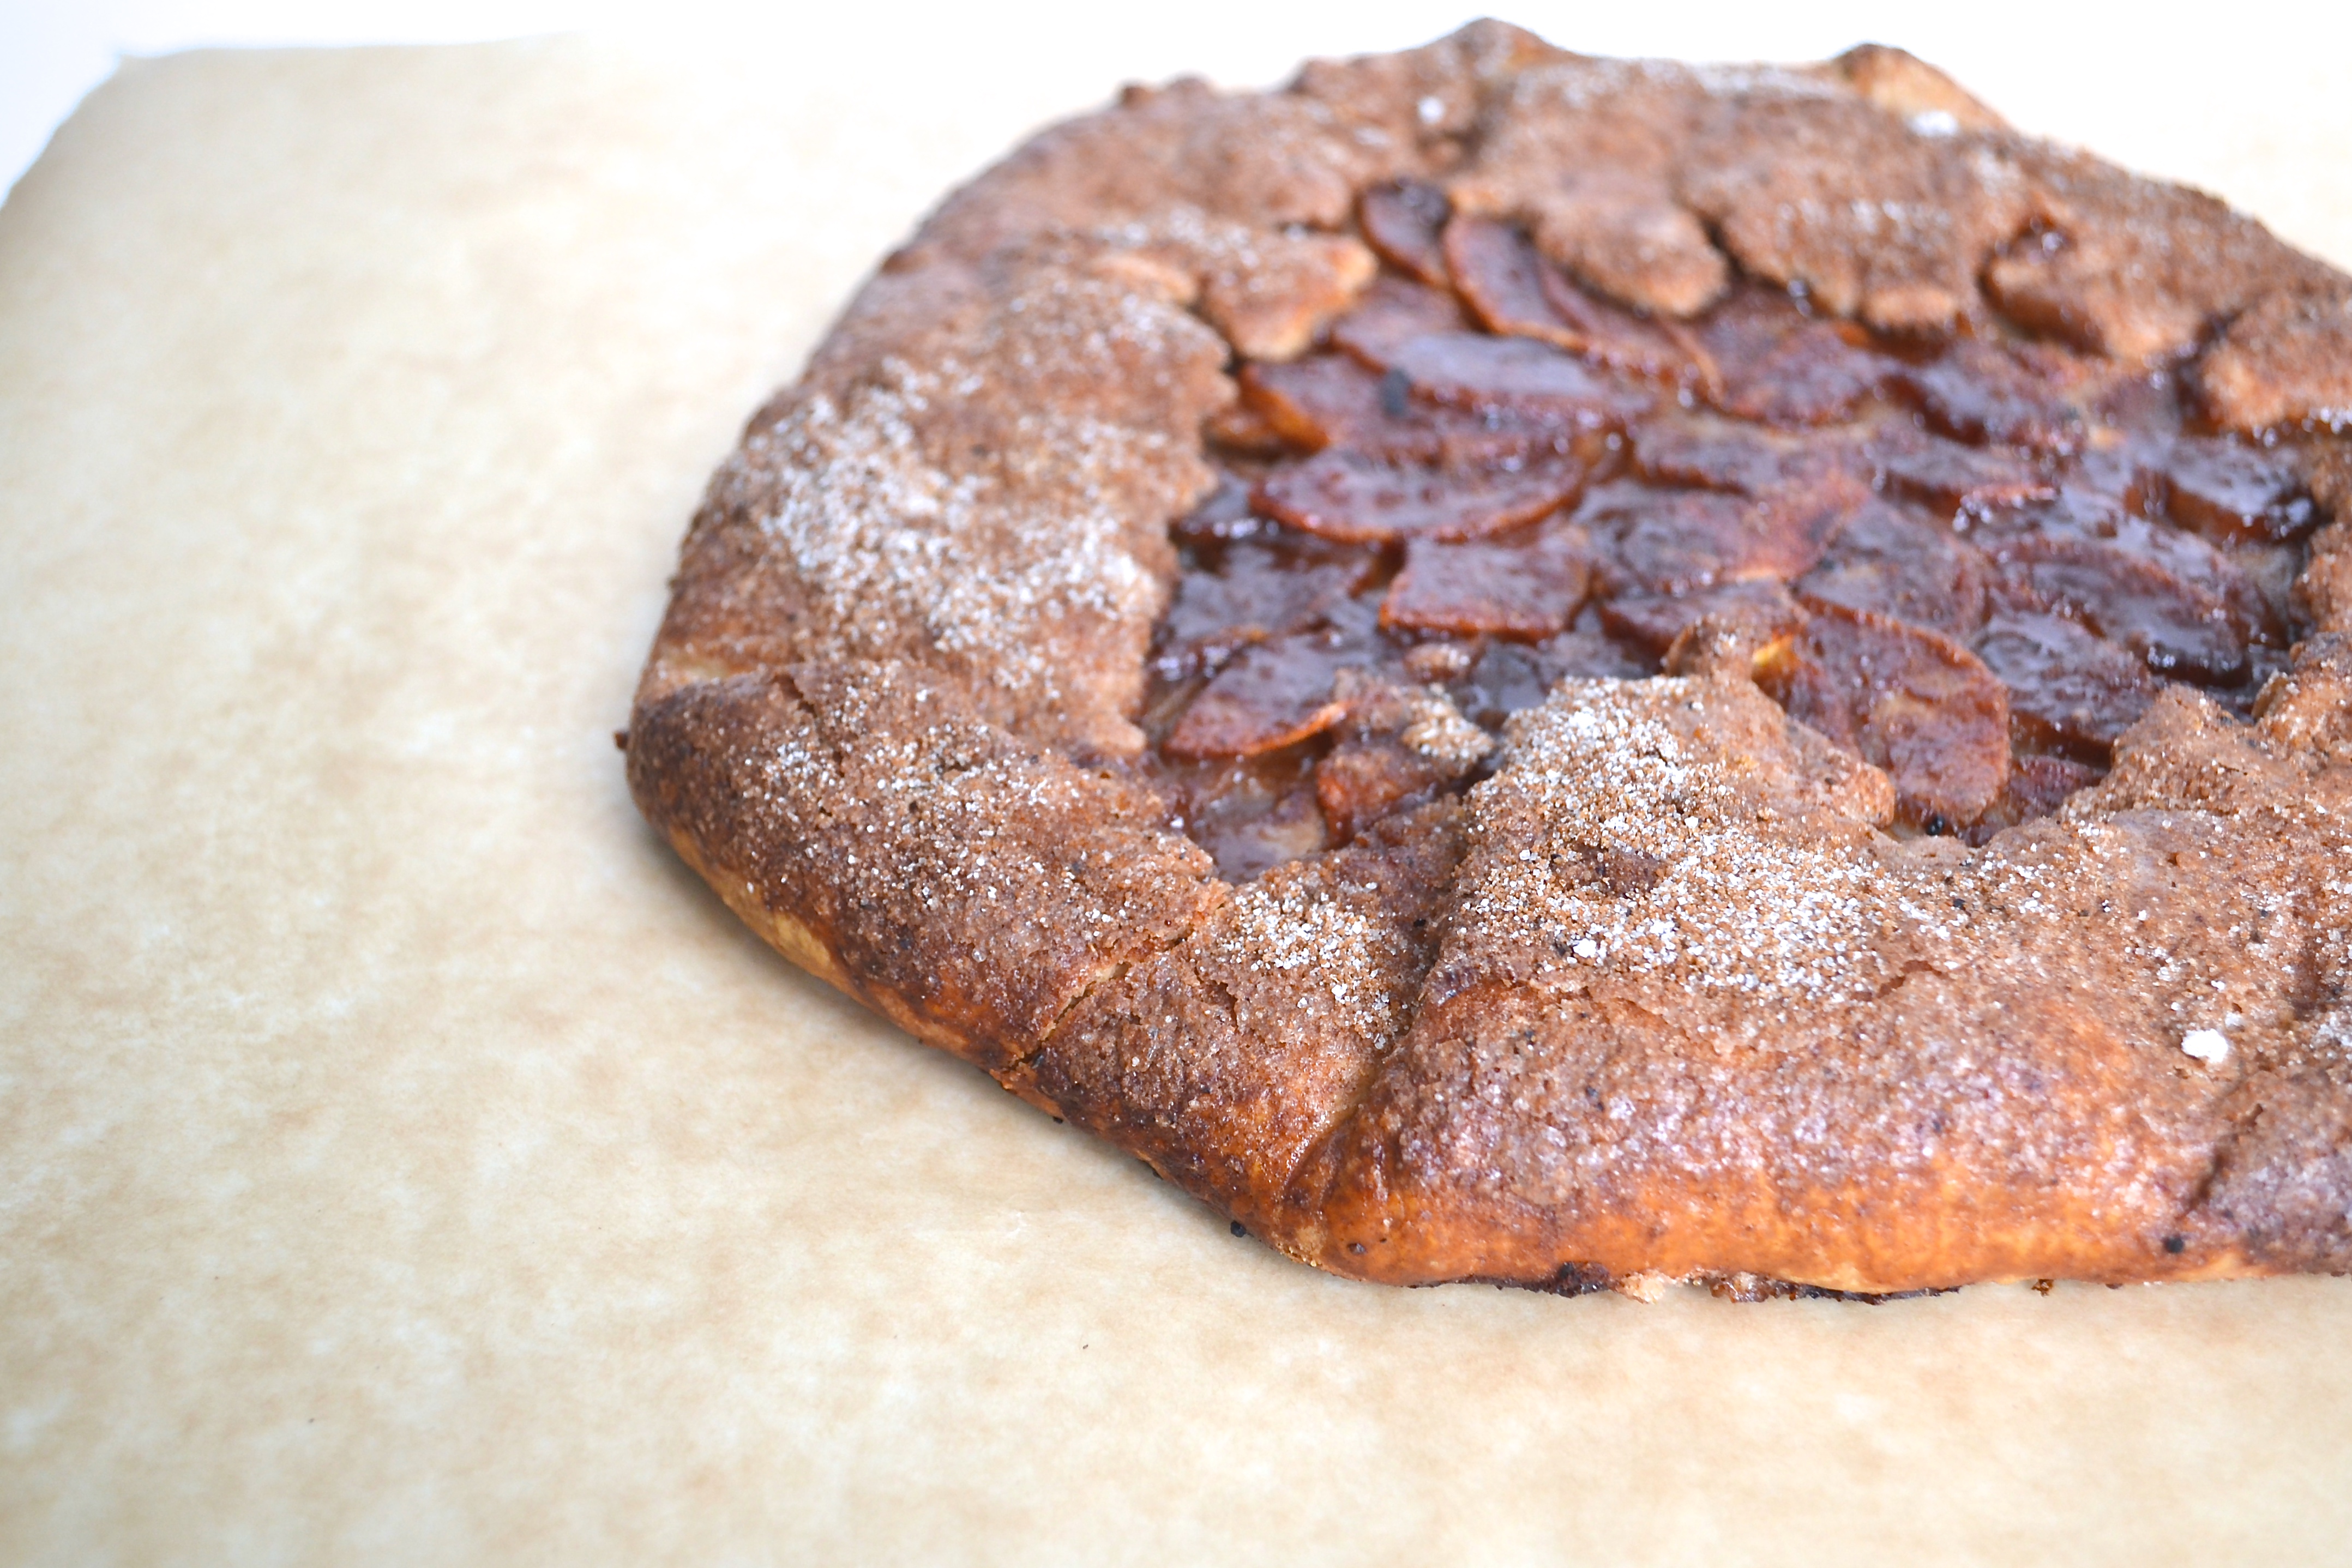
Top the galette with the cinnamon sugar mixture and bake for about 45 minutes.

dsc_1886
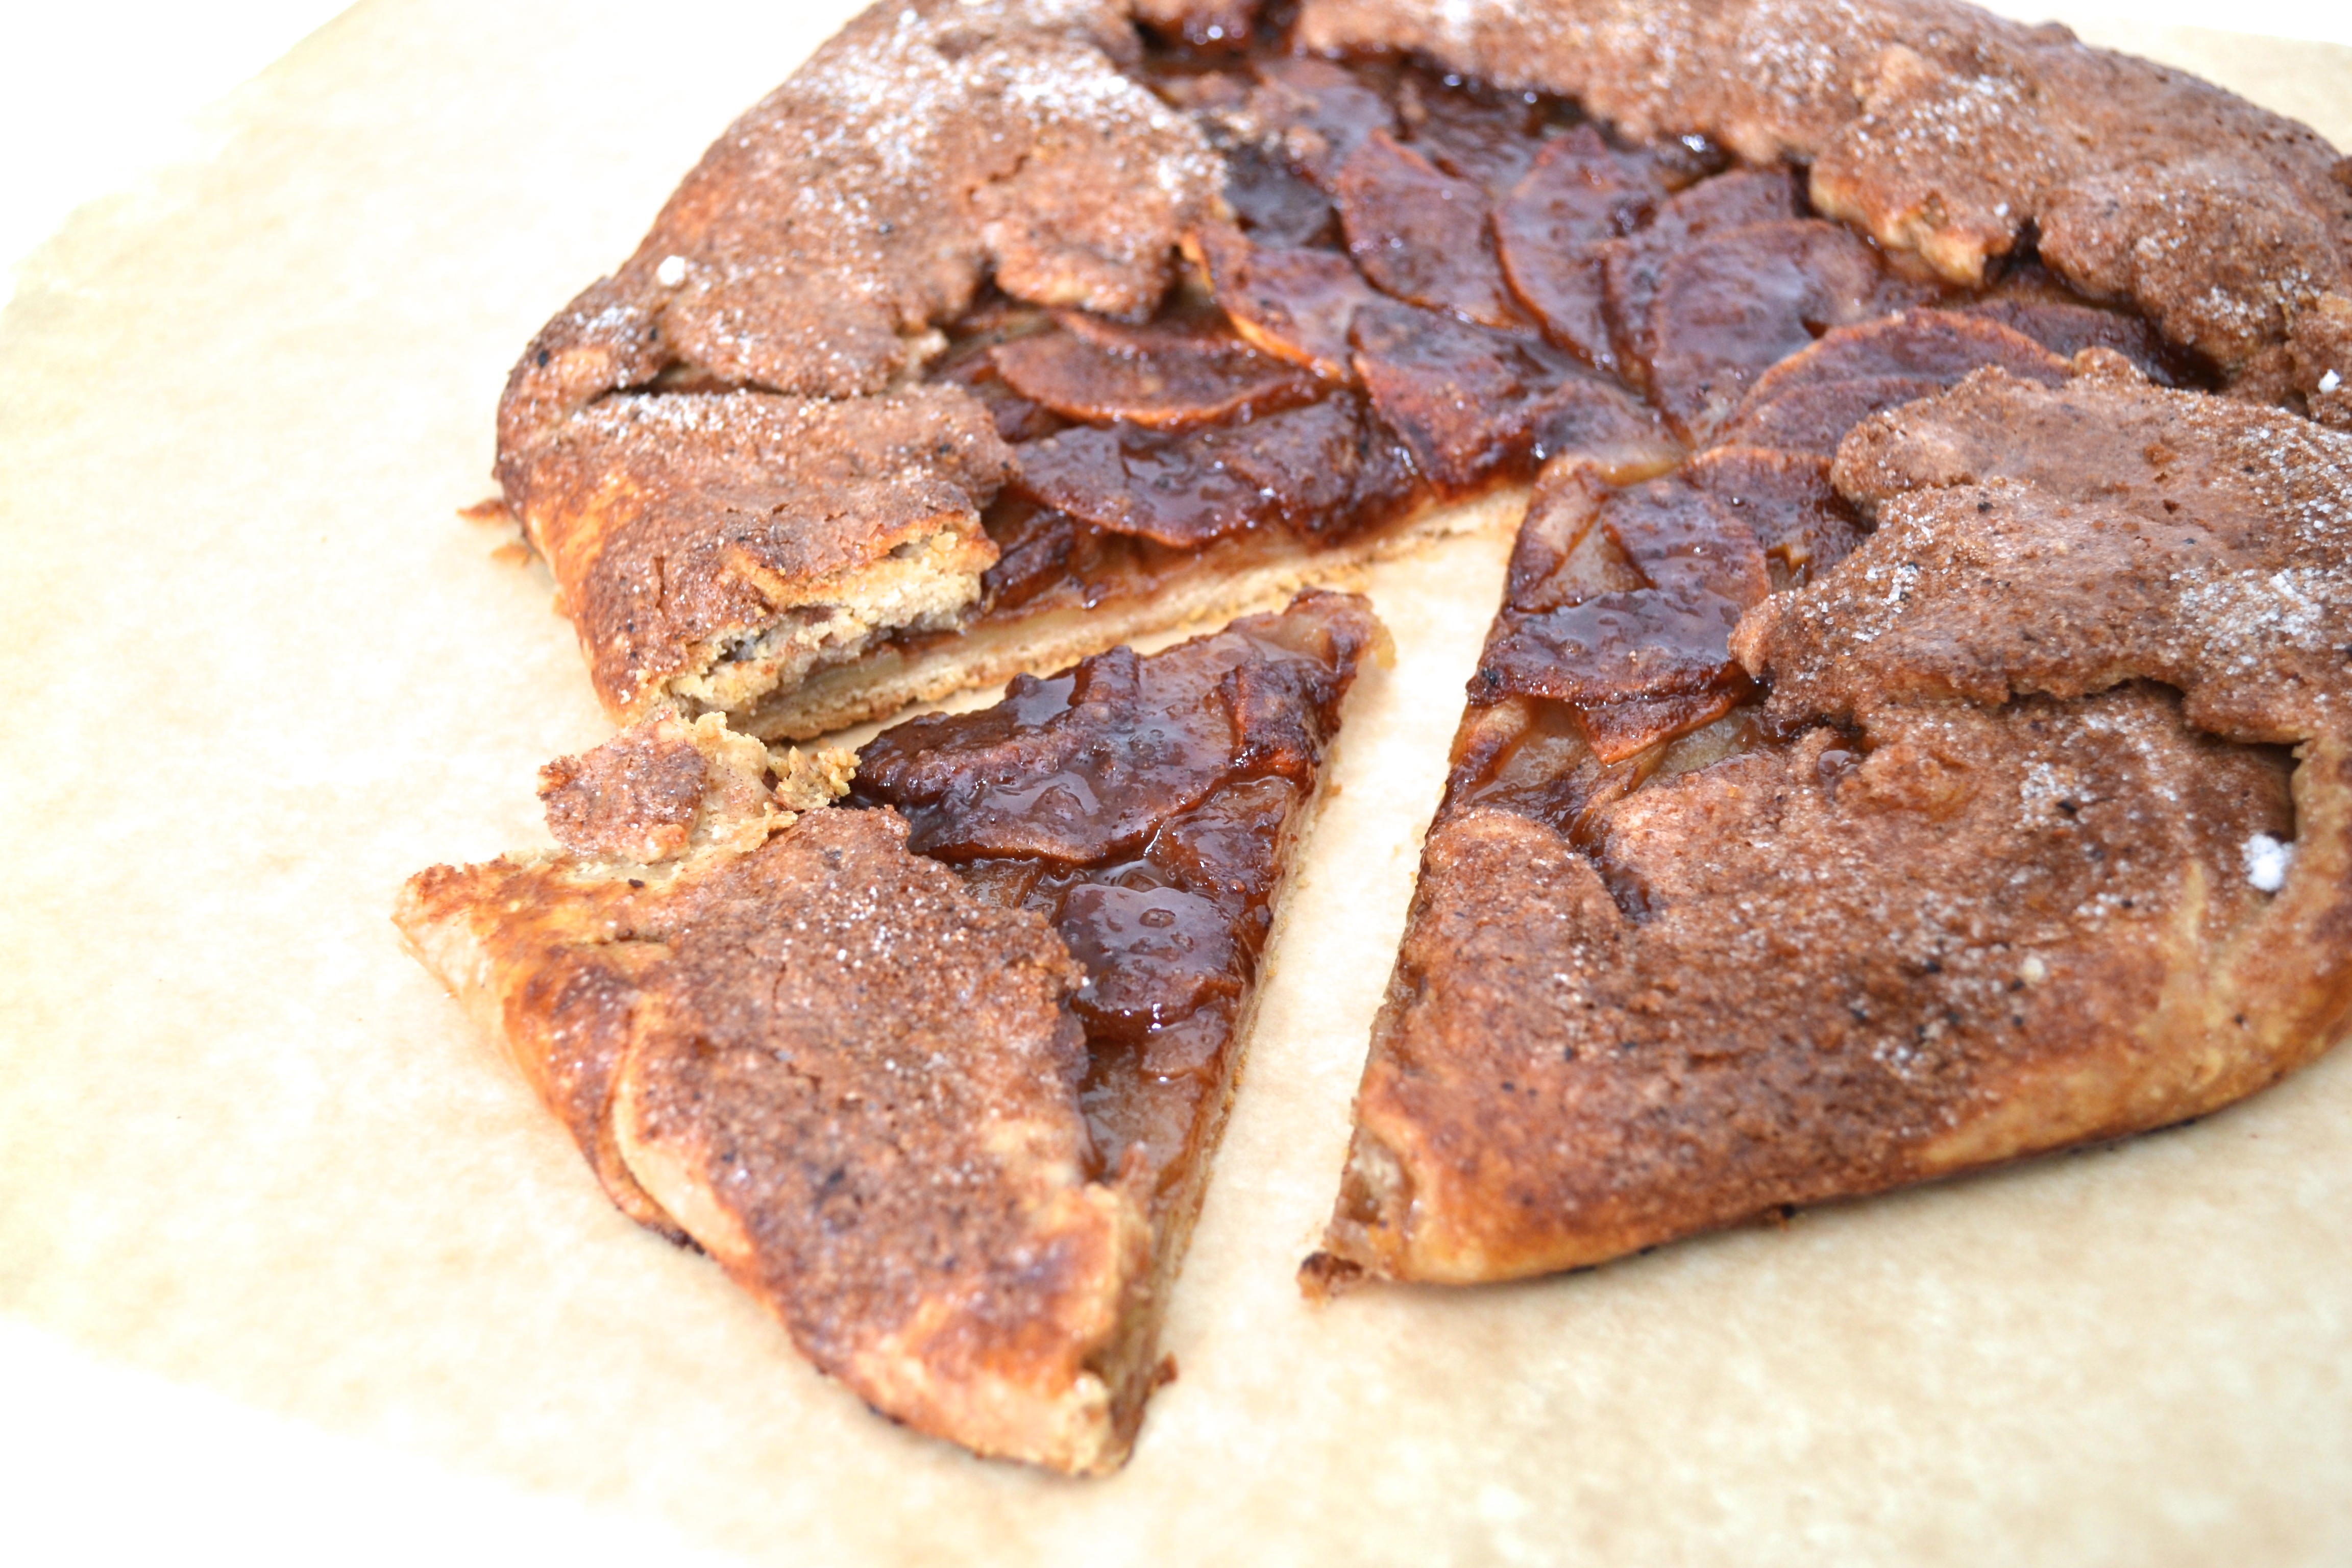
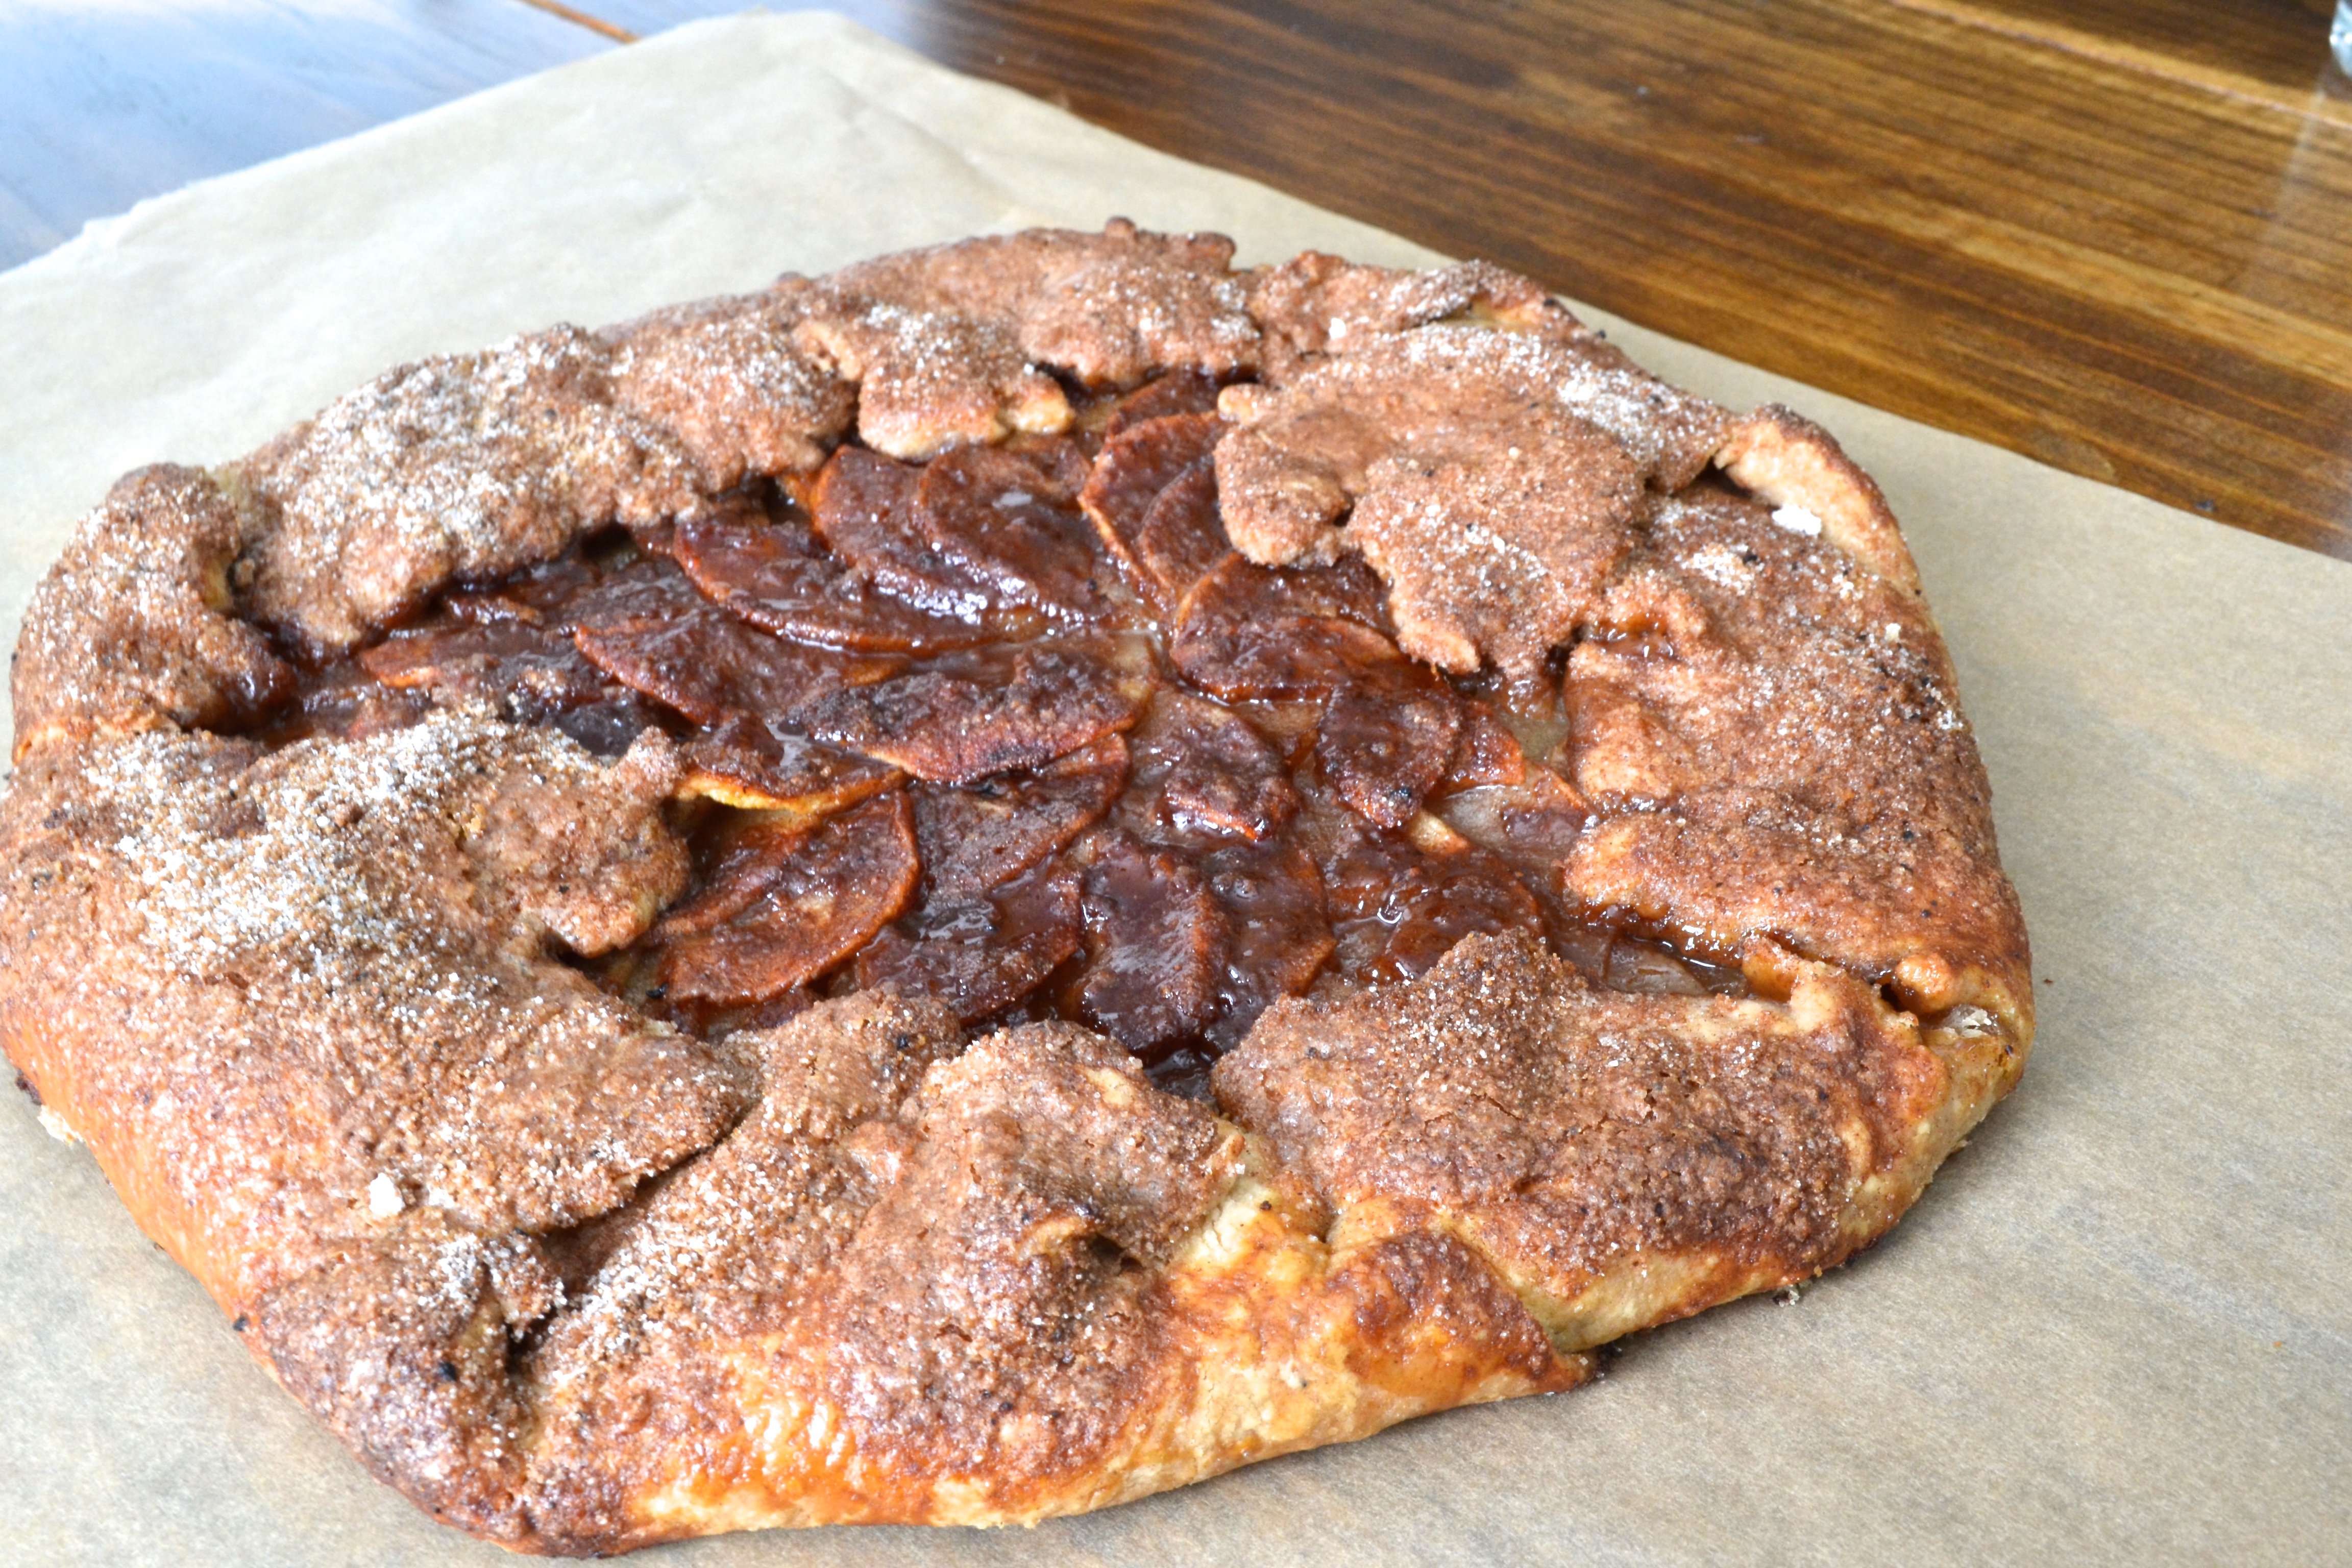
That’s it! Sweet, cinnamony galette. Make this recipe while apples are best this time of year and while you’re savoring the goodness in each day!

Apple Galette

Prep Time: 25 min. Dough Cool Time: 1 hour + 15 min. Bake Time: 45 min.

Ingredients:

For the Crust:

2 cups flour

2 tablespoons granulated sugar

1/2 teaspoon fine kosher salt

12 tablespoons (1.5 sticks) cold unsalted butter, diced

1 tablespoon cinnamon

4-5 tablespoons ice water

For the Apples:

5 apples (gala or honeycrisp, although I’m sure others would work) peeled, cored, sliced lengthwise into half moons

1/4 cup granulated sugar

1/4 cup brown sugar

1 tablespoon pumpkin pie spice

4 tablespoons (1/2 stick) butter, diced

1 egg, beaten

Preparation:

First prepare the crust. In a food processor, mix together the flour, salt, and cinnamon. Add the diced butter and pulse 10-12 times. Slowly add the ice water one tablespoon at a time until the dough just begins to come together. Remove dough from the food processor, gather into a round, and pat into a 6″ round disc. Cover with plastic wrap and allow to rest in the fridge for one hour.

Preheat oven to 400°. Prepare a baking sheet with parchment paper and set aside. Remove dough from the refrigerator and roll it on a well-floured surface to a large round, about 15″ diameter and 1/2″ thick. Transfer dough onto prepared baking sheet (tip: for easy transfer, use spatulas underneath to help lift the dough).

Starting about 2″ in from the edge of the dough, arrange apples in a circular pattern, overlapping a bit as you work (see picture above). Fold dough edges gently over the apples and pinch to seal any holes or creases that might allow liquid to escape. Place entire baking sheet with galette back in the refrigerator for about 15 minutes.

In a small bowl, combine the granulated sugar, brown sugar, and pumpkin pie spice. Remove galette from the refrigerator. Brush beaten egg around the crust of the galette. Sprinkle the sugar all over the galette, tucking some sugar under the folded crust as well. Top the apples with the butter pieces. Bake for 45 minutes until crust is golden and apples are bubbling. Remove from oven and transfer galette to a wire rack to cool completely before cutting. Serve warm alongside whipped cream or ice cream.

Eggplant Fries

Eggplant Fries

If you were to ask me to name my favorite food when I was about eight years old, the answer would probably be fried eggplant. I was pretty dang good at making it on my own around that age. My parents would help with the knife skills of course, but I’d be the one with the egg and the breadcrumbs and the pats of butter ready to go. I’ve always been my dad’s sous chef. Still today, when I see eggplant parmesan on an Italian menu, it’s hard for me not to order it. I love it.

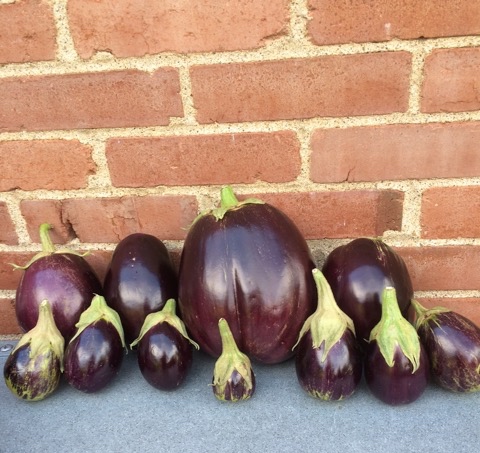
My parents had a surplus of eggplants in their garden this year, and one was so round and plump that they lovingly named it “Big Bob.” Here is Big Bob with his eggplant family. I almost want to draw stick figure hands and feet and smiles on all of them.

IMG_3044


Photo Credit: My wonderful father

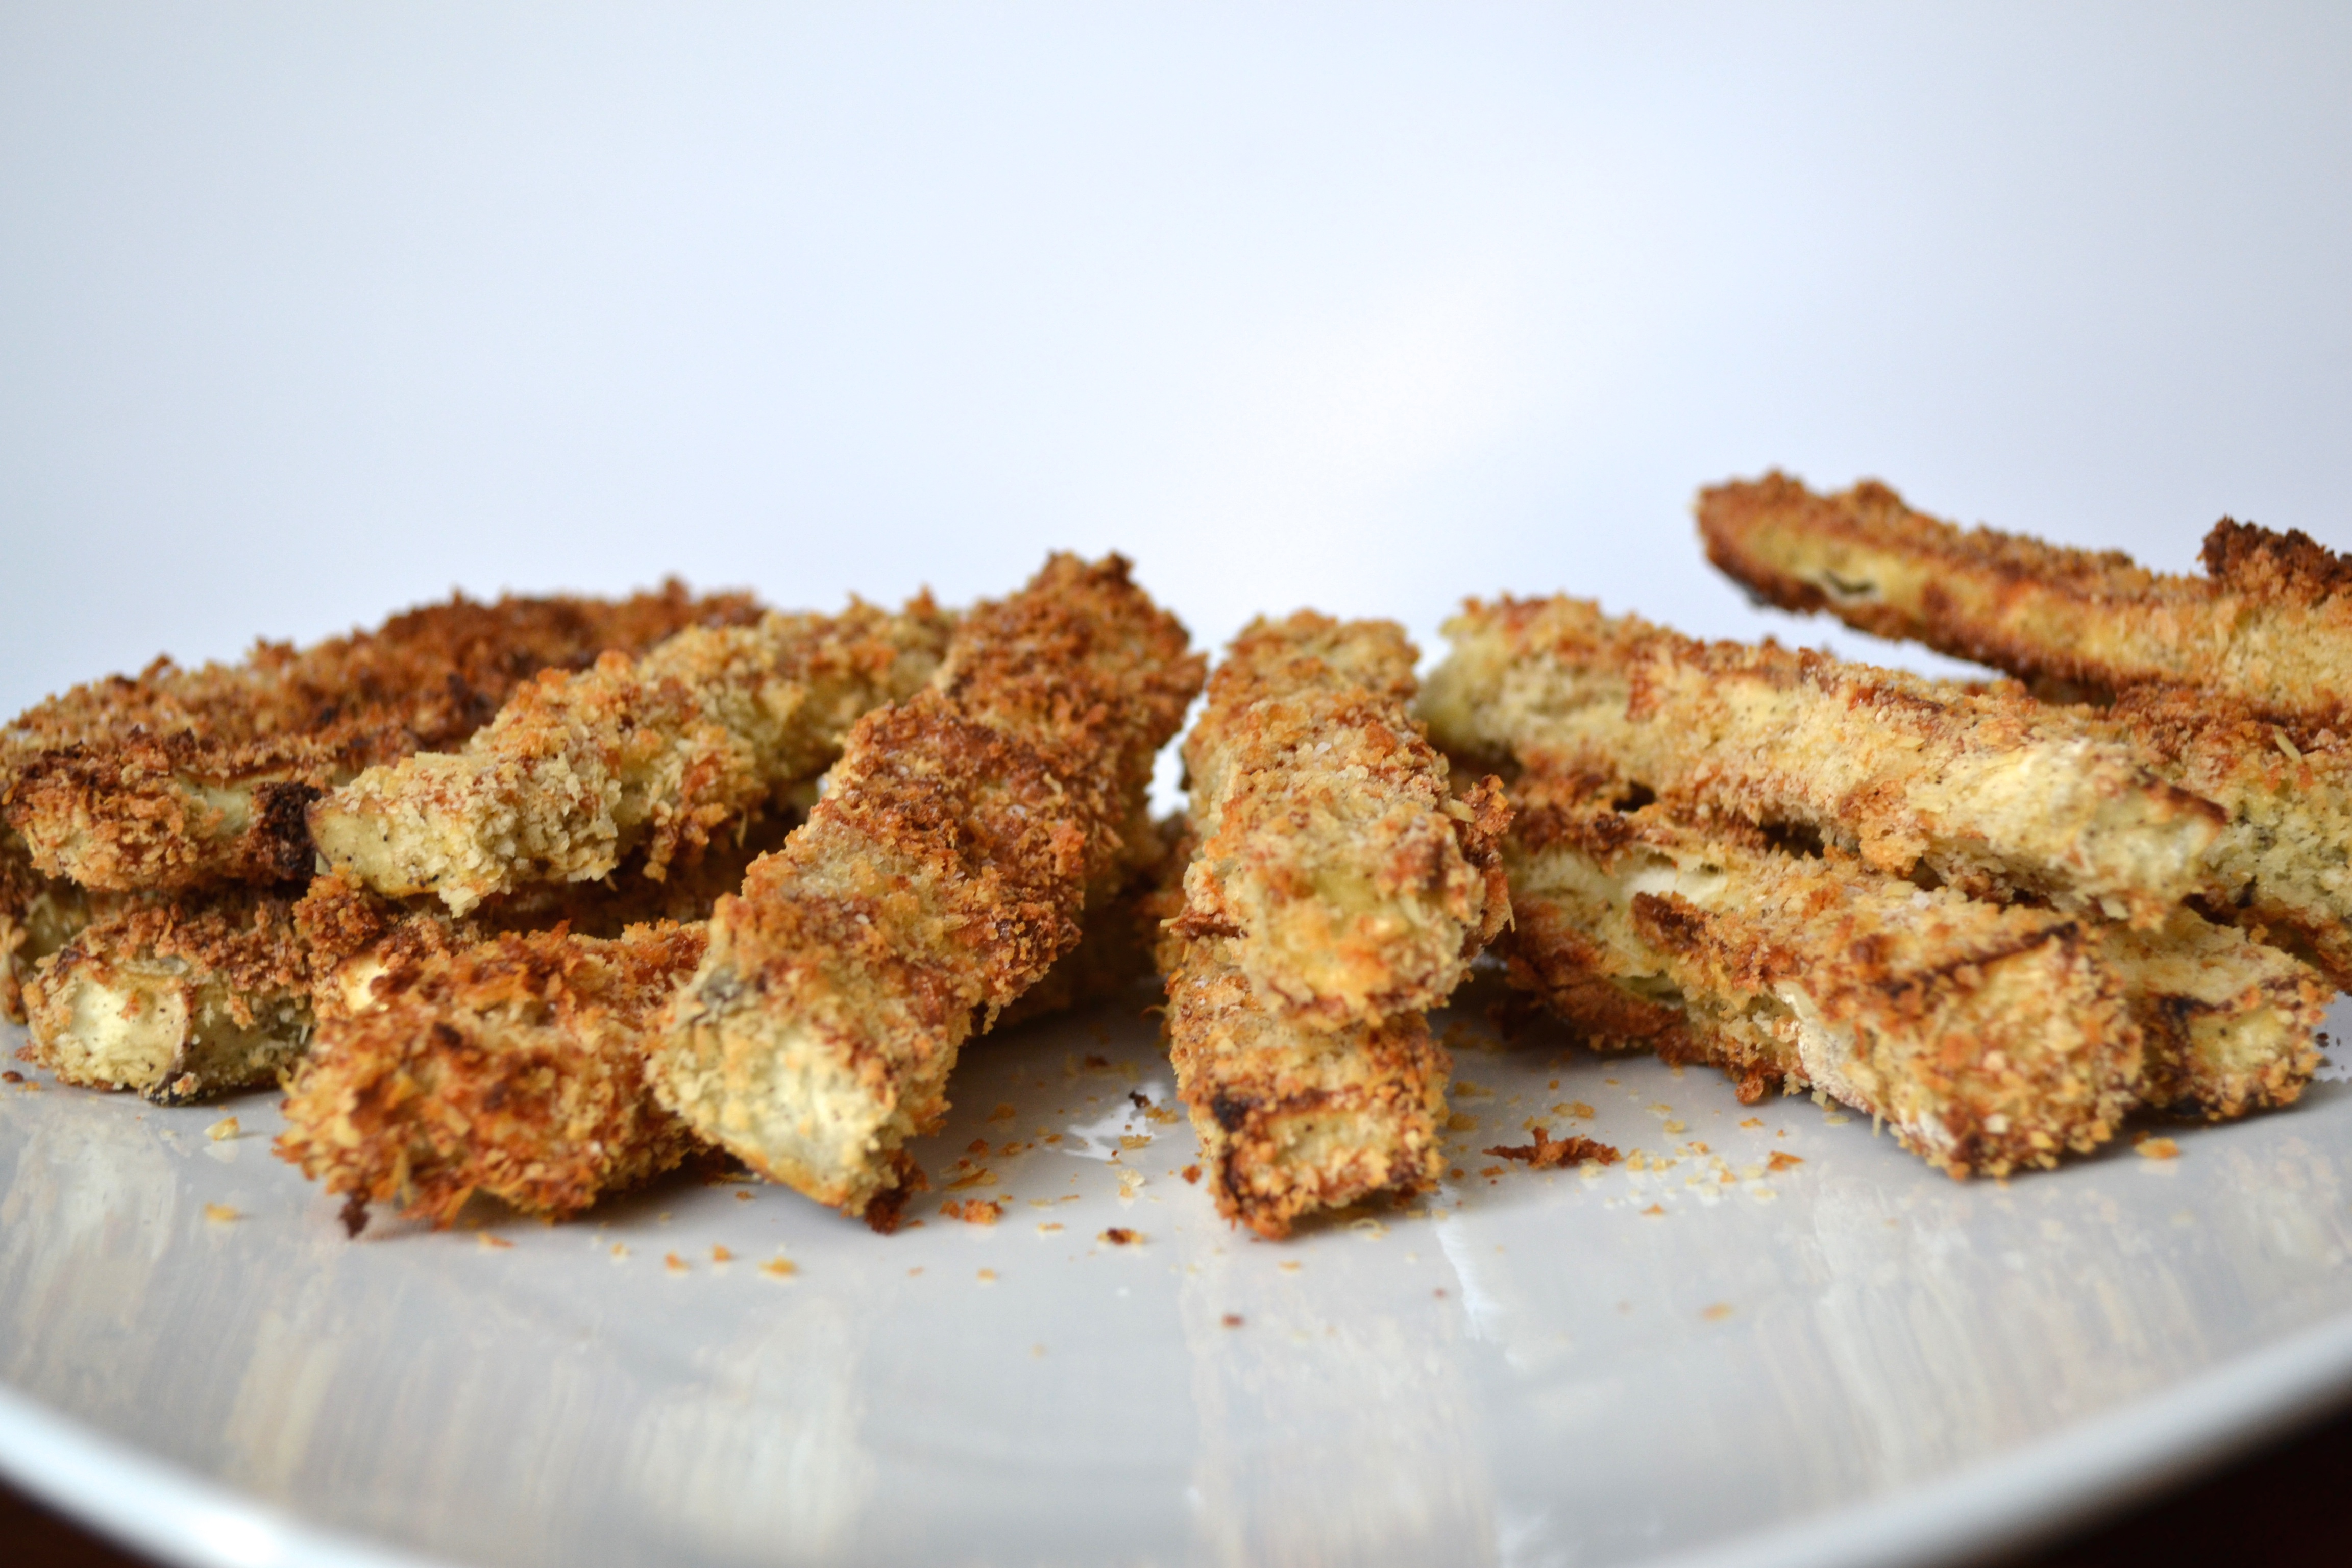
I had the pleasure of adopting Big Bob and turning him into something delicious. These eggplant fries are a lighter alternative to the traditional eggplant parmesan, and they’re fun to eat because you can dunk them in any sauce. We like ranch with ours. Whether you are looking for a lighter appetizer or side, searching for vegetarian recipes, or just have a surplus of eggplants to eat, we hope these eggplant fries rise to the occasion.

RIP Big Bob.

Eggplant Fries

Prep Time: 25 min. Cook Time: 25 min.

Ingredients:

1 medium eggplant

1 cup flour

1 tablespoon kosher salt

1 tablespoon black pepper

1.5 teaspoons onion powder

1.5 teaspoons garlic powder

2 cups panko

1 cup parmesan cheese

3 eggs, beaten

Olive oil

Preparation:

Preheat oven to 425°. Place a nonstick (or lightly oiled) wire rack atop a baking sheet and set aside.

Using a sharp knife, carefully cut off the top and bottom ends of the eggplant. Slice eggplant lengthwise into 3/4″ thick pieces, then cut each of those into 3/4″ thick sticks.

Set up three separate bowls, large enough to fit each piece of eggplant in.

Bowl 1: Flour, salt, pepper, garlic powder, onion powder, mixed

Bowl 2: Eggs, beaten

Bowl 3: Panko and parmesan cheese, mixed

Coat each eggplant stick one at a time first in the flour, then in the egg, then in the panko, and place on the wire rack. Lightly drizzle olive oil over all the eggplant sticks. Bake for 25 minutes until golden brown. Remove from the oven and allow eggplant to cool before serving. Serve with ranch, BBQ, or ketchup.

Strawberry Oatmeal Bars

Strawberry Oatmeal Bars

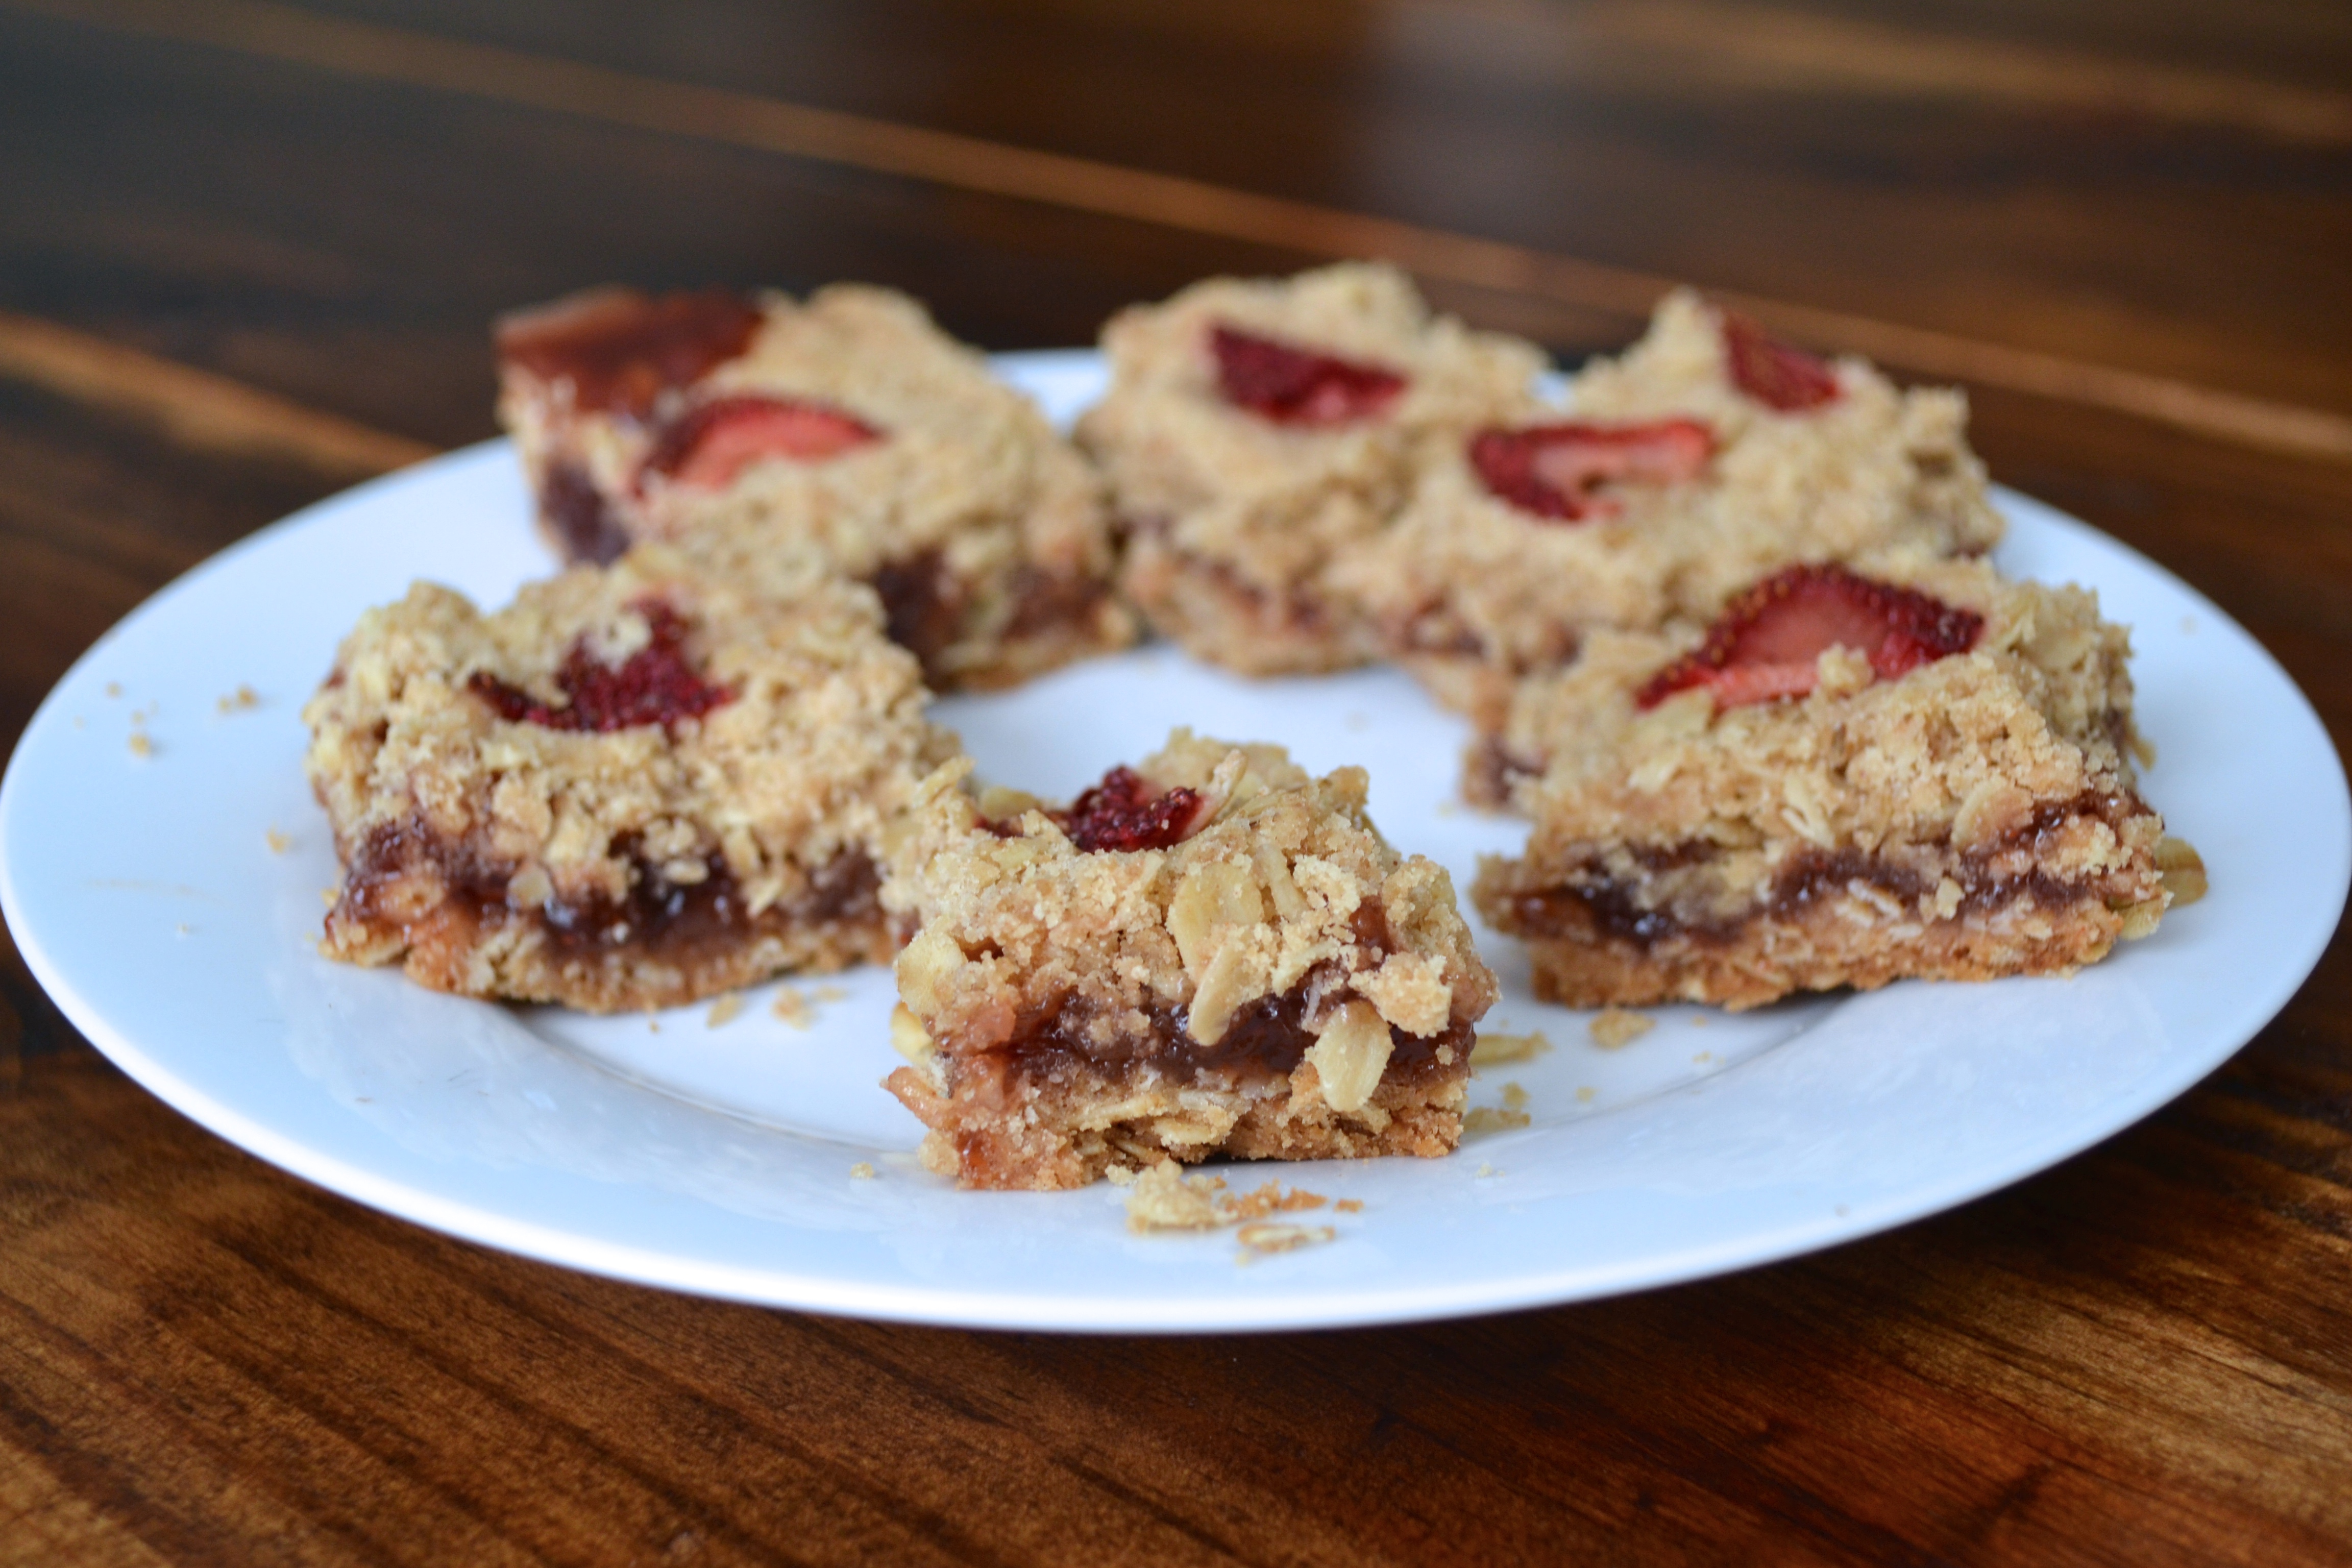
The school year is in full swing here in St. Louis. Actually, it’s been in full swing for a while! Teachers in some districts went back as early as August 3rd! According to my books, when school starts, fall starts. Yes, I know it’s still a zillion degrees outside, but I still associate back to school season with fall, so I’m just going to pretend it’s happening. Bring on the fall baking, pumpkin beer, college football, and cool weather! Most of the buildings I work in are super nicely air conditioned, so I tend to bring along sweaters and long sleeves. However, at the end of the day I am quickly reminded of those zillion degree temps as soon as I step outside and am smacked in the face with St. Louis humidity. Sigh, I guess I’ll hold off on breaking out the boots for another few weeks.

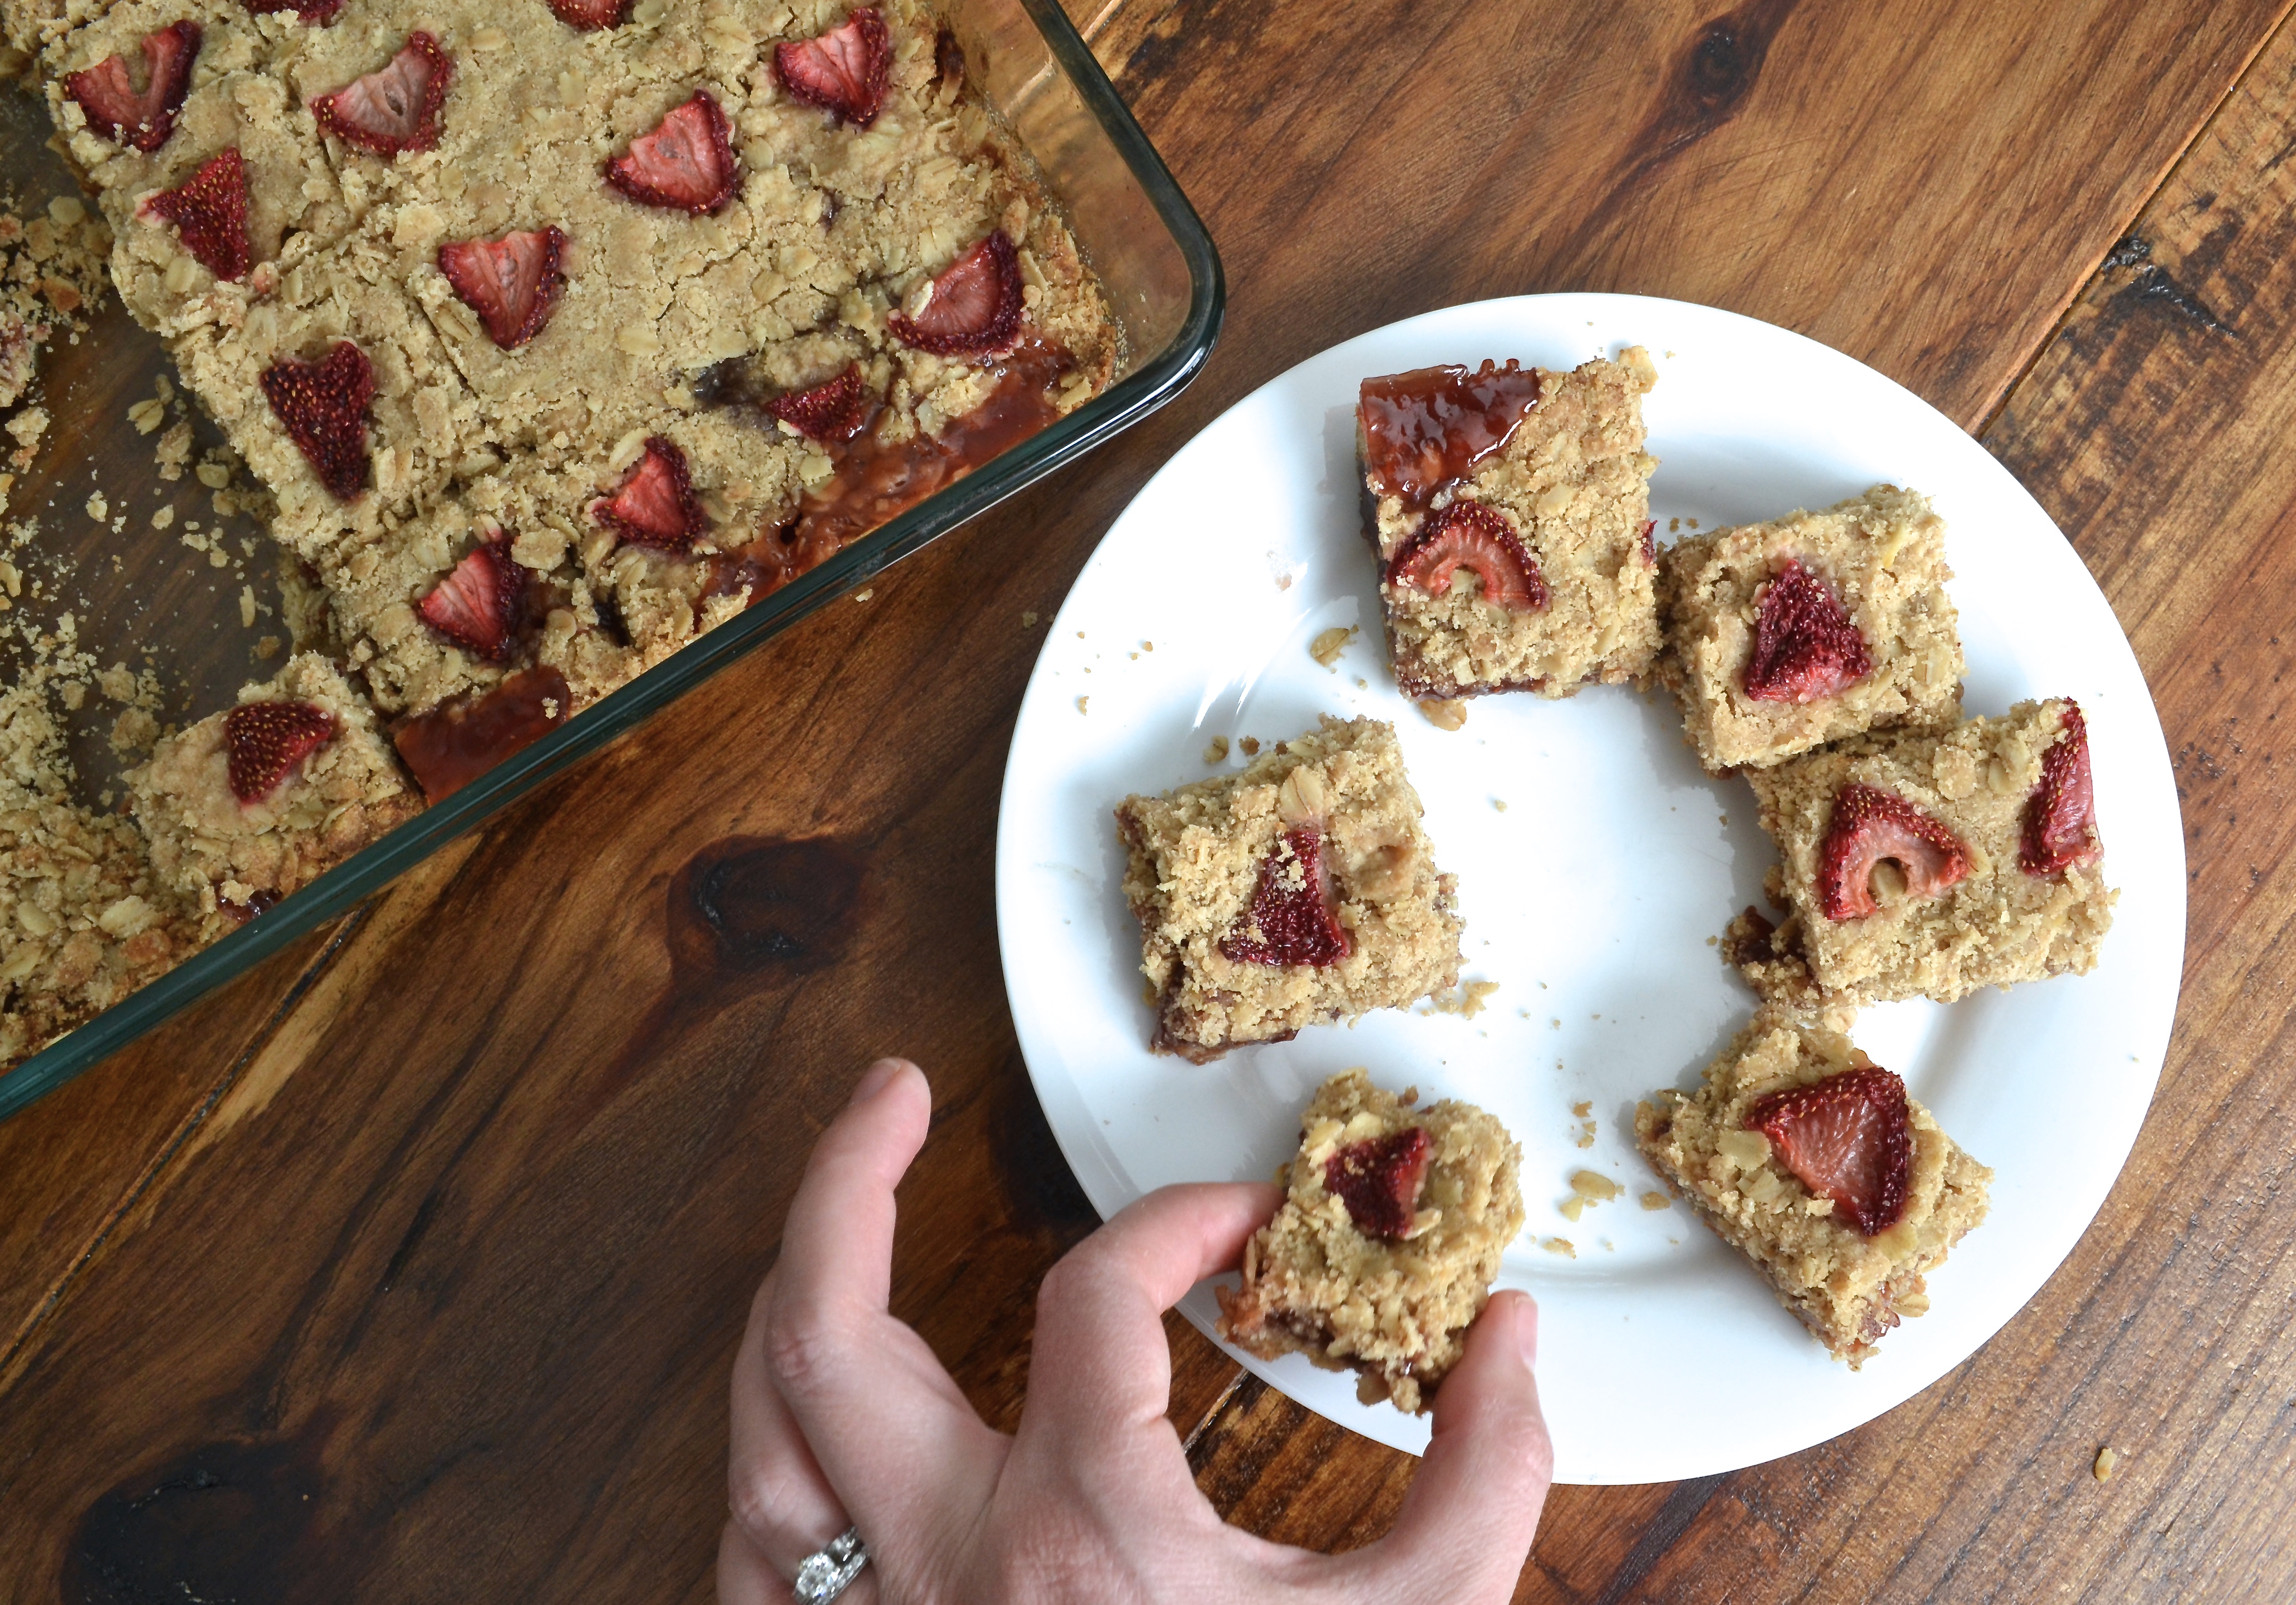
If you’re like me, the hankering for an after school snack still exists when you’re an adult. These delicious snack bars are super easy to make and a perfect way to satisfy that afternoon craving. You can replace the preserves in the middle with any flavor that you like. There are still a few good peach crops left this year, so that might be a nice way to say goodbye to summer flavors. Strawberry, raspberry, blueberry, rhubarb, peach, and apple all work, so go with your favorite jam!

Happy back to school to all students, teachers, parents, staff, and anyone else who works in education! It’s going to be a great year. Oh, and sorry it’s been forever since I’ve posted. I’m sure you can tell whenever I’m back to work due to the decreased number of blog posts. More deliciousness coming your way sooner rather than later.

Strawberry Oatmeal Bars

Recipe Adapted From: Ree Drummond

Prep Time: 20 min. Cook Time: 45 min.

Ingredients:

2 cups flour

2 cups oats

1 cup brown sugar

1 teaspoon ground cinnamon

1 teaspoon baking powder

1/2 teaspoon kosher salt

2 sticks butter, cut into small pieces

1 jar (17 oz.) strawberry preserves

1 cup sliced strawberries + 1 tablespoon sugar

Preparation:

In a small bowl, combine sliced strawberries and one tablespoon of sugar. Stir to coat strawberries with sugar and set aside.

Preheat oven to 350°. Butter a 9 x 13″ glass pan. In a large bowl, mix together the flour, oats, brown sugar, cinnamon, baking powder, and salt. Add the pieces of butter to the mixture and use your hands to work the butter through the mixture until most of the mixture is moist from the butter, with some dry crumbs remaining.

Dump half the mixture into the buttered pan and press so that crumbs stick together. Next, spread the preserves in an even layer on top of the first layer. You might need to use your fingers here, depending on the thickness of your preserves. Be sure to get the edges, too! Dump the other half of the mixture on the preserves, spread evenly, and lightly press.

Arrange sugary strawberries on top of the bars. Bake for 45-50 minutes until the bars are just starting to turn golden brown. Remove from oven and cool completely before slicing.

DSC_1794