Vegetarian dishes that are simple, flavorful, and filling are hard to come by. There has been so much buzz in the food world about cutting back on how many nights we eat meat, but they don’t really suggest meals that are just as filling. I would love it if some of those health conscious documentaries came with recommended recipes in the ending credits. Don’t get me wrong, we love meat. A lot. But we’ve been trying to cut back and to incorporate more vegetarian dishes throughout the week. Cold weather produce is now appearing at the market and we’re excited to develop some vegetarian dishes highlighting seasonal flavors. Enter, the squash.
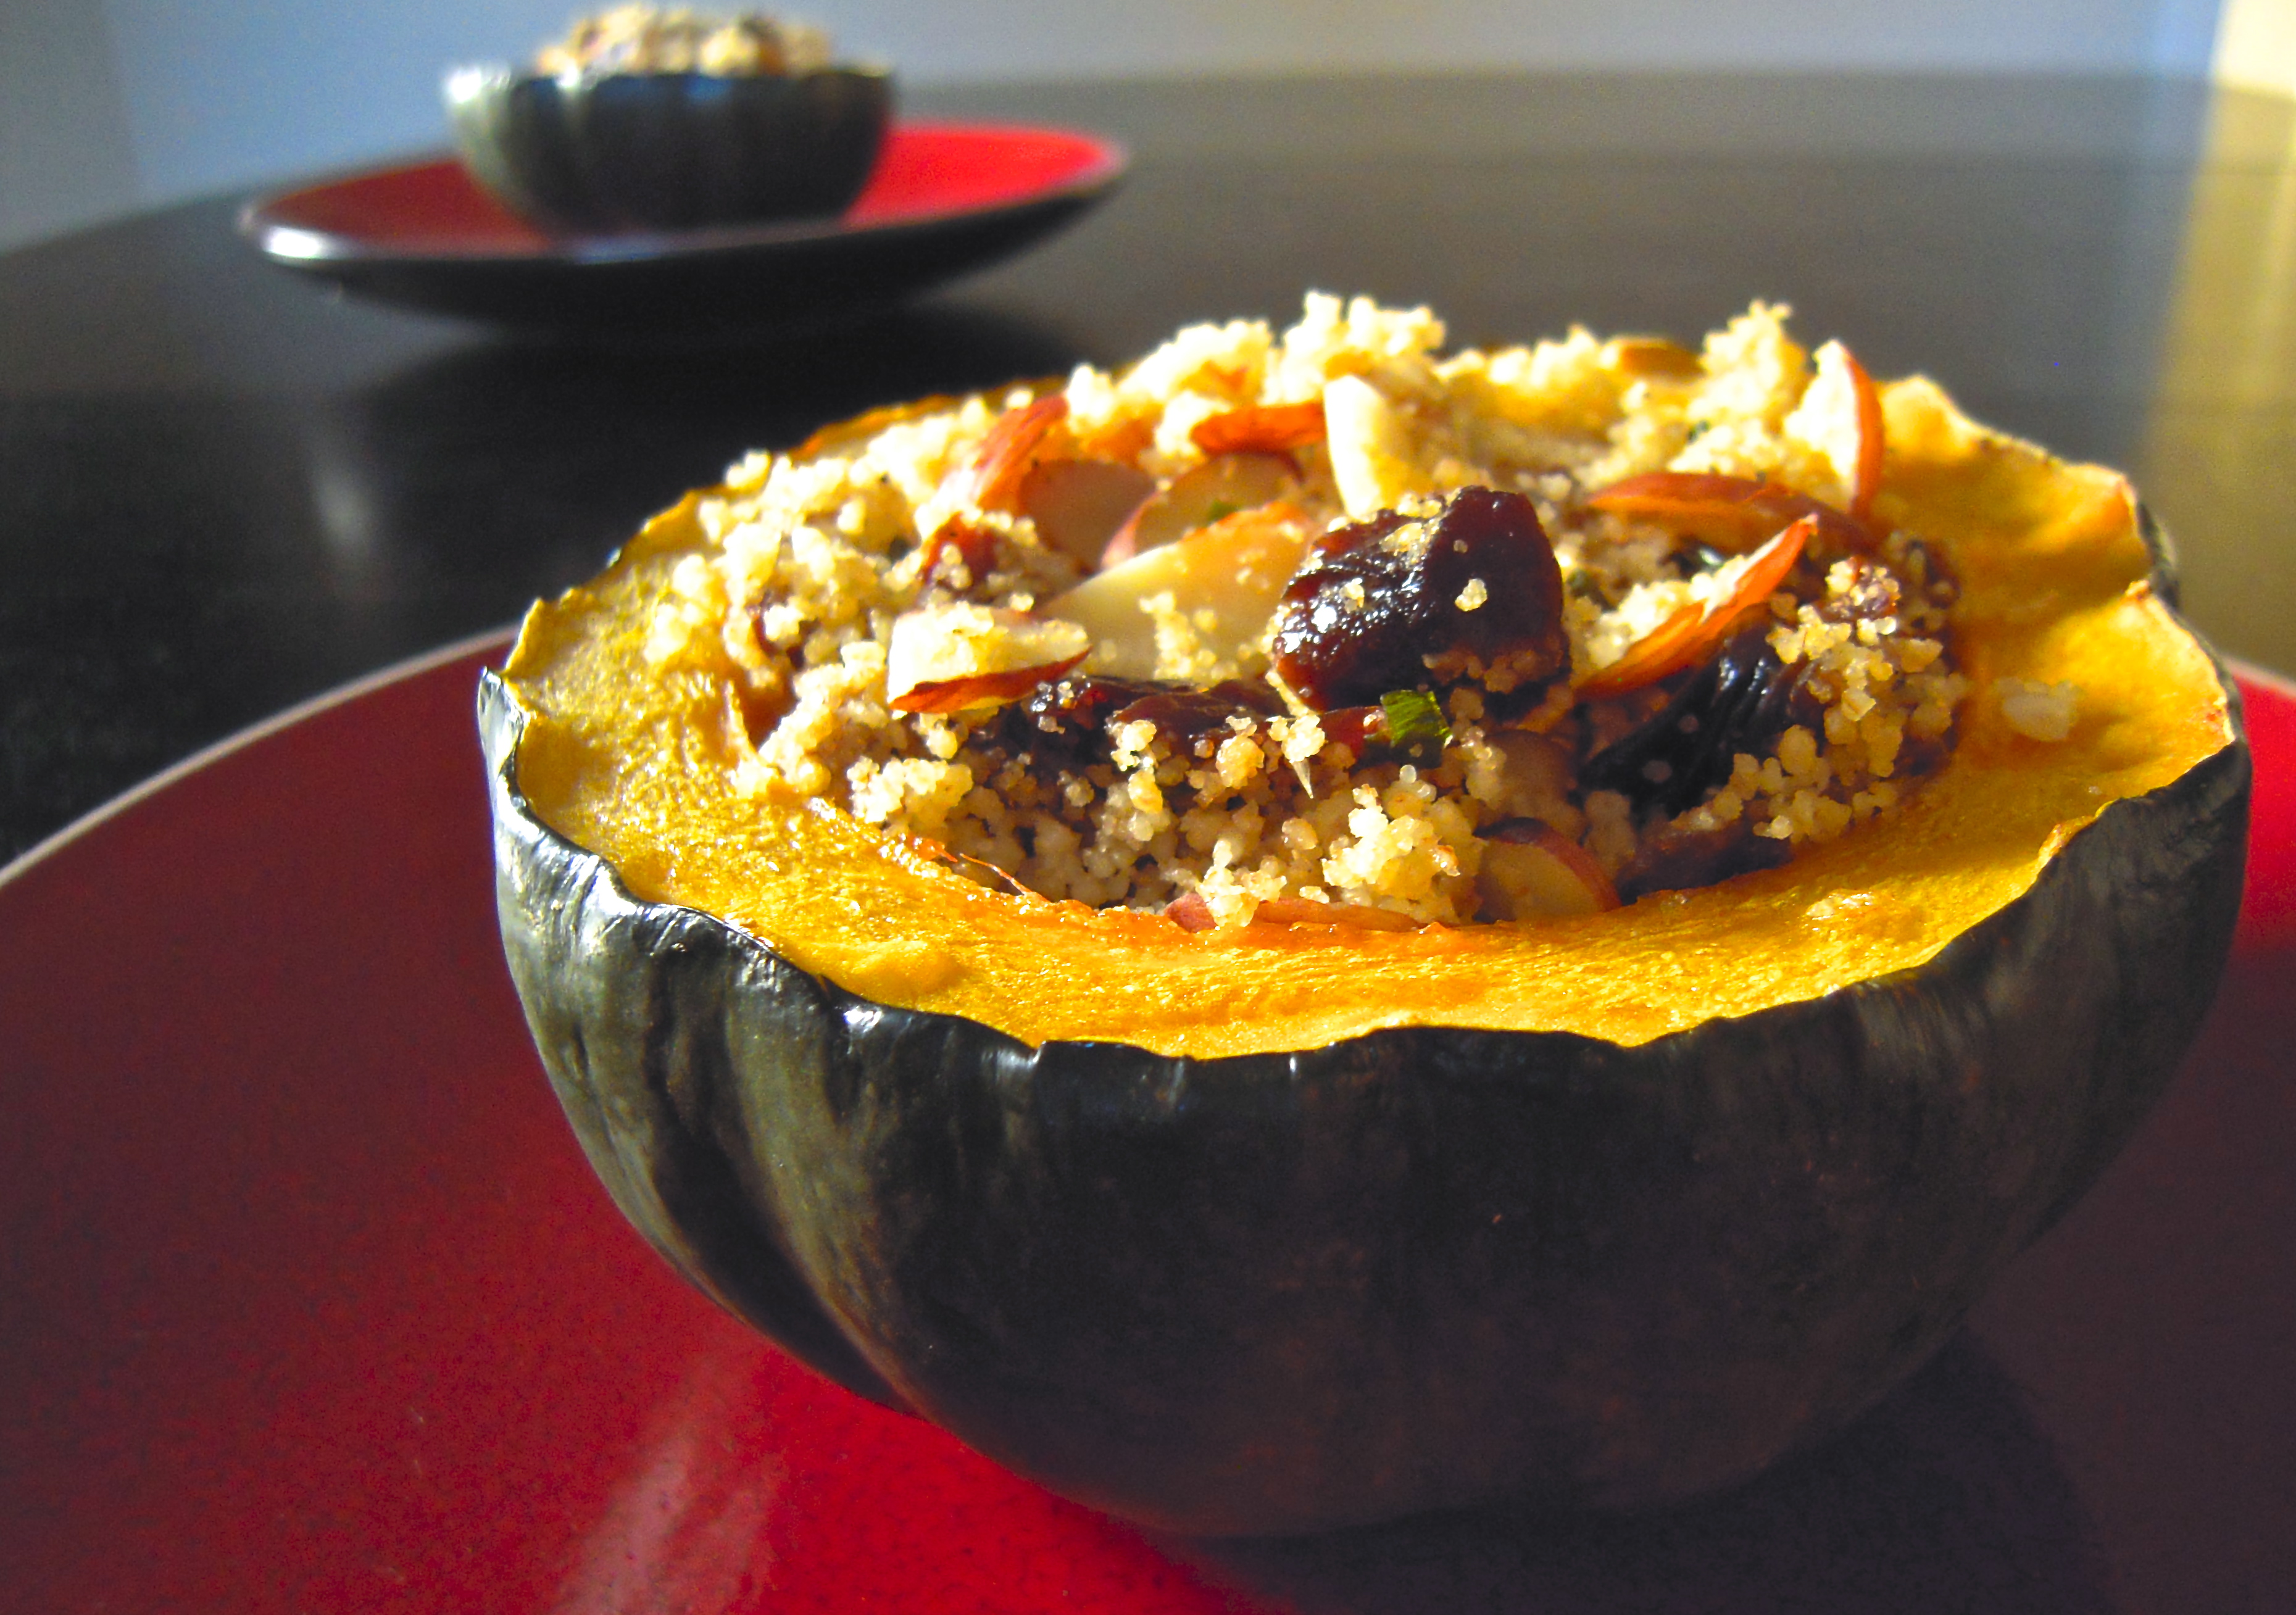
I love to decorate with mini squashes throughout fall, but never really cooked with an acorn squash before. The huge display of squash at Whole Foods was calling me this week and I went for it. This dish is whole grain, sugar free, vegetarian, and full of autumn flavors. The sweet dried fruit paired with the savory garlic and green onion make this satisfying dish burst with flavor.
Honestly, acorn squash tastes similar (to me) to a butternut squash. They come in all sizes. If you’d like for this to be more of a meal in itself, go for the big squash and really stuff the insides. This works great as a side though too, using smaller squash and less filling.
Oh, and as a side note, I had to Google the plural form of “squash.” (Squashes just sounded funky!) Ha!
Ingredients:
4 small acorn squashes, seeded and halved
1 cup whole wheat couscous
1 cup dried fruit (cranberries or prunes), chopped
1 cup blanched sliced almonds
2 tablespoons unsalted butter
2 cloves garlic, minced
2 tablespoons green parts of a green onion, sliced thin
1 teaspoon fine kosher salt
1 teaspoon black pepper
Preparation:
Preheat oven to 350°. Place each squash half cut side up in a large glass baking dish. Drizzle each half with olive oil. Bake for 40-50 minutes until soft when poked with a fork.
While squash is baking, prepare the stuffing. Bring 1 1/4 cups salted water to a boil. Stir in couscous and remove from heat. Let stand for 5 minutes and fluff with a fork.
In a small sauté pan, melt butter over medium heat. Add garlic and green onion and cook for about 4 minutes until fragrant.
Add the garlic, green onions, and butter to couscous and stir until well combined. Stir in salt, pepper, almonds, and dried fruit.
Fill each squash half with couscous mixture, using between 1/4 – 1/3 cup per half. Serve warm.
*Don’t forget to enter our baker’s blade giveaway this week!*